<<< DIY Campervan Mini Projects
 I recently noticed water dripping into our van from the Winegard TV antenna winder handle, during a period of steady rain and strong winds. The water was entering down the shaft, not from around the mounting seal on the roof.
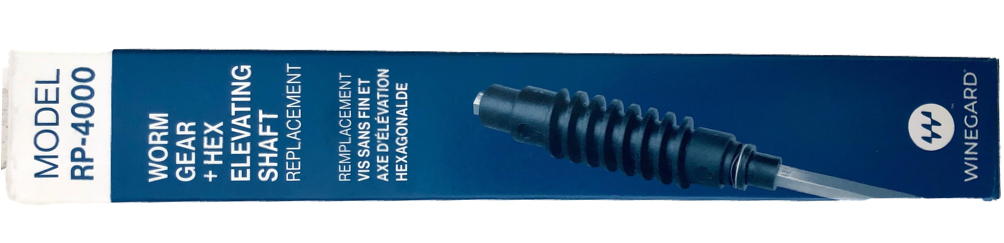
After making some enquiries I was advised that the issue was most probably related to a worn seal on the worm gear elevating shaft that raises the antenna – which requires a replacement of the worm gear shaft (around $50). The washers do not appear to be available separately.
This page contains some brief details about how to disassemble and reassemble the Winegard TV antenna to replace the worm gear shaft. (If you are interested in only regular maintenance procedures, scroll down to that section.)
Note: I am not 100% sure that the replacement of the worm gear shaft as discussed below has resolved the water ingress issue, though it hasn’t leaked since the replacement – but we haven’t had any really bad weather since then either! I will update this page in the future if / when new information is available. (I remain open to the idea that there may be an issue with the design of the mechanism.)
A replacement worm gear shaft is available from caravan parts suppliers…..
-
- Working inside the van, use an Allen key to loosen (don’t remove) the grub screw on the winder crank handle and remove the handle and pressure spring from the spindle shaft. Be careful not to lose the spring or the small grub screw!

- Remove the plastic rotation plate by sliding it down from the shaft….
- Working on the roof of the van, remove the circlip and pin that holds the antenna pole and lift gear to the rotation flange. (To assist with later re-assembly, note which hole the pin is fitted to.) Slide the antenna free from the rotation mechanism.
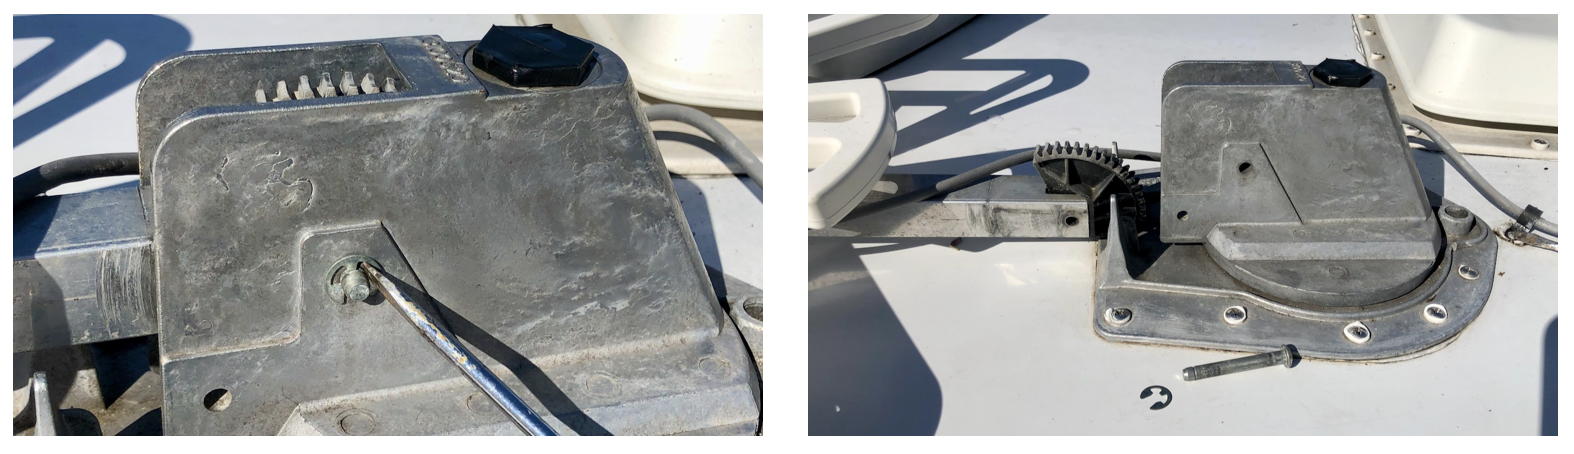
- Use a spanner to loosen and remove the black housing nut on the top of the rotation flange.

- Lift and remove the gear shaft from the rotating mechanism. You may need to use a pair of pliers to grip the top of the hexagonal shaft to lift it out of the flange.

-
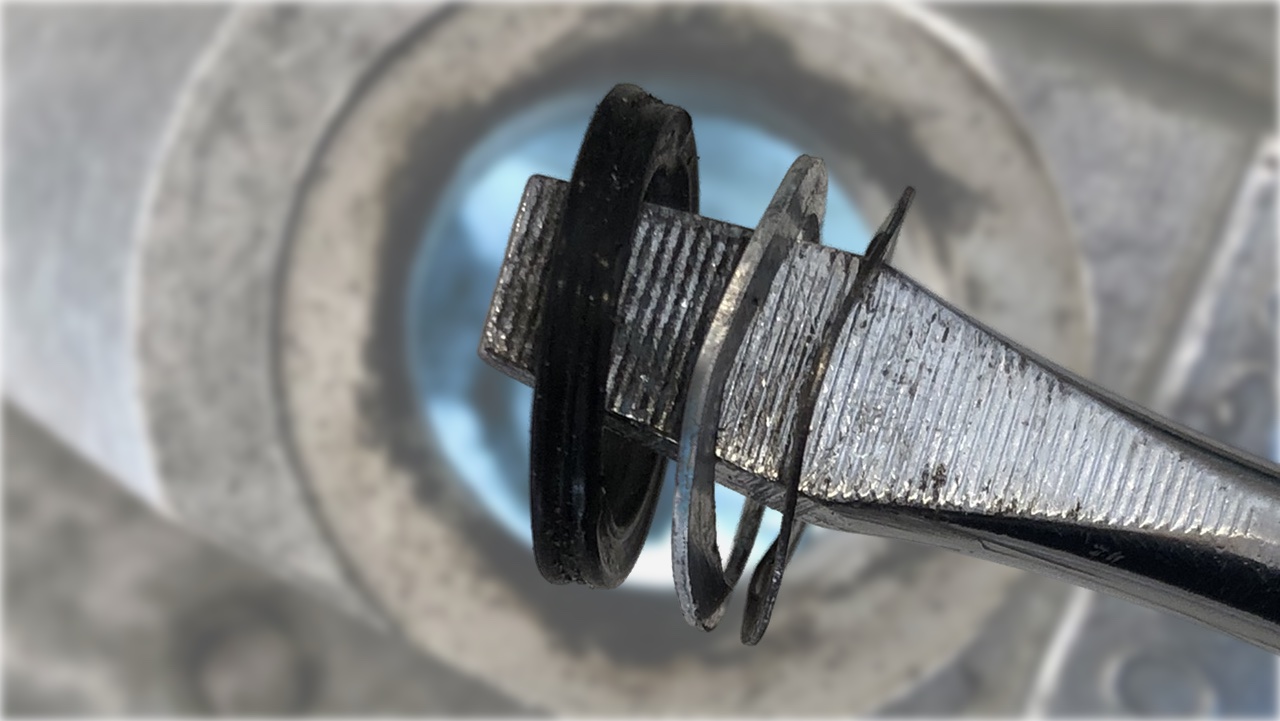
Check that the shaft washers (2 metal washers and 1 rubber seal ring) have come out with the spindle.

If not, you will need to manually remove the washers from the rotation mechanism. This will require some poking and prodding with a small screwdriver.
You may be able to do this without removing the rotating mechanism from the roof of the vehicle. More likely you will need to remove the rotating flange from the roof – which is relatively easy to do…..
- Working inside the van, use a 24mm tube spanner to remove the nut securing the mechanism to the roof. Be careful not to lose the thin plastic washer that fits above above the nut.

-
Back on the roof, the entire rotation flange can now be lifted from the roof of the van. Be careful to retain the washer around the shaft (see picture below) and the plastic sheet cover which sits over the roof plate.
-
Use a small screwdriver to prise the old washers loose, and remove them from the shaft recess inside the rotation plate.
-
Assembly is a reversal of the above procedure, with attention to the following….
-
Spray any moving parts with a Silicone lubricant spray (NOT WD-40 type oil sprays – these oil sprays may damage the rubber and plastic parts.)
-
If fitting a new worm gear shaft, cut the hexagonal steel shaft to the correct length before inserting it into the rotation plate. Use the old spindle as a template for the correct length. File the cut end smooth.
-
Check that the shaft is pushed firmly into place in the housing, with the sealing ring fitting neatly in the machined recess in the rotation plate. Use the winder crank handle to check that the shaft rotates smoothly.
-
Re-fit the rotation plate on the roof, checking that the washer is in place on the shaft, under the rotation plate, and the plastic sheet is re-fitted over the roof plate.

-
After fitting the locking nut from inside the van (with the 24mm tube spanner) check that the plate rotates smoothly. You may need to back off the locking nut a little to ensure smooth rotation. (Leave the tube spanner and Allen key in a handy place in your van for later adjustment while you are travelling. This nut often works itself loose over time, and requires nipping up.)
-
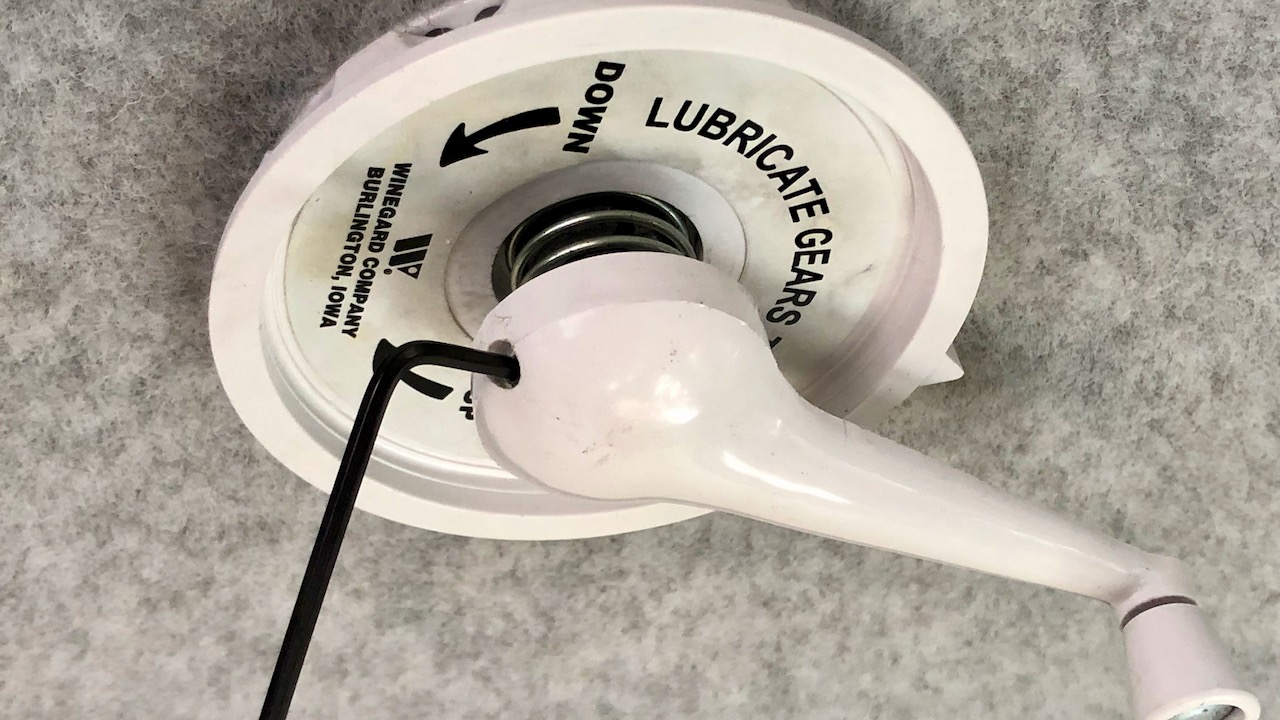
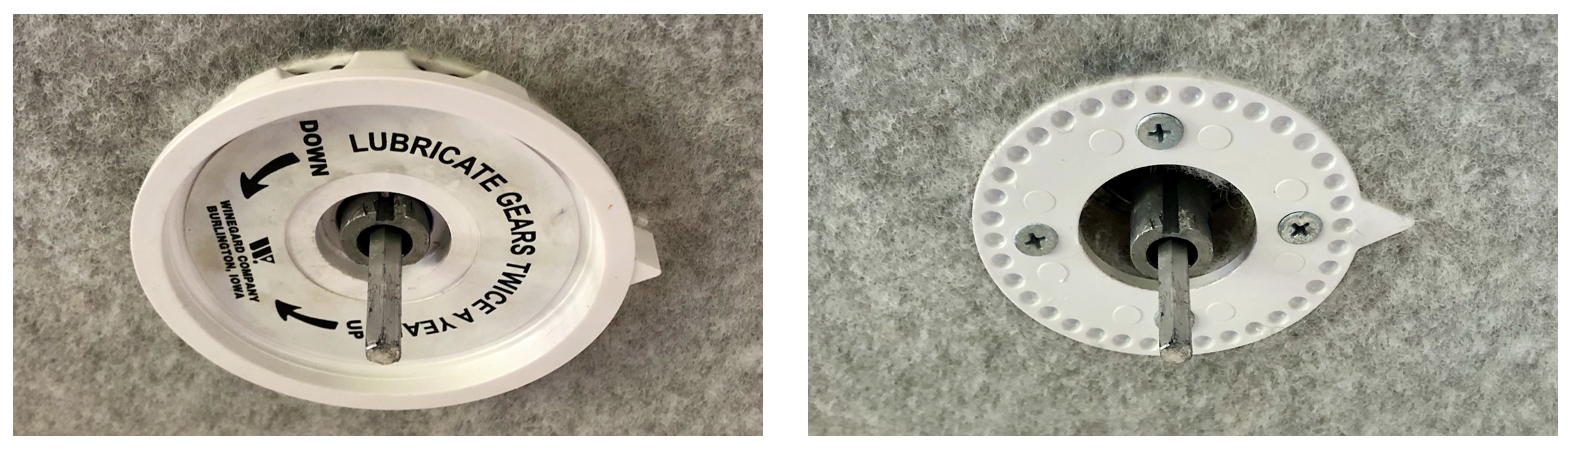
Lubrication and on-going maintenance – Remove the small black plastic cap from the lubrication point on the rotation plate on the roof and flush with silicone spray (NOT a WD-40 type oil spray)…
-
Move the rotation flange backwards and forwards through its full rotation arc to distribute the lubrication.
-
Note: If you are only undertaking periodic antenna maintenance, and have not already removed the crank handle, spring and plastic rotation locking plate to replace the elevating shaft, raise and rotate the antenna as you would normally do from inside the van.
-
Refit the plastic plug cap.

-
Use the Silicone spray to lubricate the elevating gear mechanism.
-
This lubrication should be applied every 6 months.
-
-
Re-insert the pin and circlip to join the antenna post and gear assembly to the rotation plate. Align the lowered antenna to its horizontal travelling position.
-
Inside the van, re-fit the plastic rotation plate, so that the ‘V’ pointers are aligned. (Again, check that this is done with the antenna in its correct travelling position on the roof.)
-
Re-fit the winder crank handle and pressure spring, and tighten the grub screw.
-
Check that the antenna raises and rotates smoothly.
See also: Aim your TV antenna with the Antenna Mate app (iPhone)
-
- Working inside the van, use an Allen key to loosen (don’t remove) the grub screw on the winder crank handle and remove the handle and pressure spring from the spindle shaft. Be careful not to lose the spring or the small grub screw!