See also: DIY Campervan Mini Projects >>>
DIY Fit-out | What size van? | Draw a floor plan | Cabinet materials | Fittings | 12V power
A bit sketchy
Step One in a van conversion is no different to any other construction project – measure up the floor space available in your chosen van, sketch up some options, then draw an accurate plan of your chosen layout.
Graph / grid paper from your local stationery shop is a useful media for sketching ideas to a rough scale.
The one item that everything else will probably be designed around is your bed. And the size of this may vary, depending on your body size.
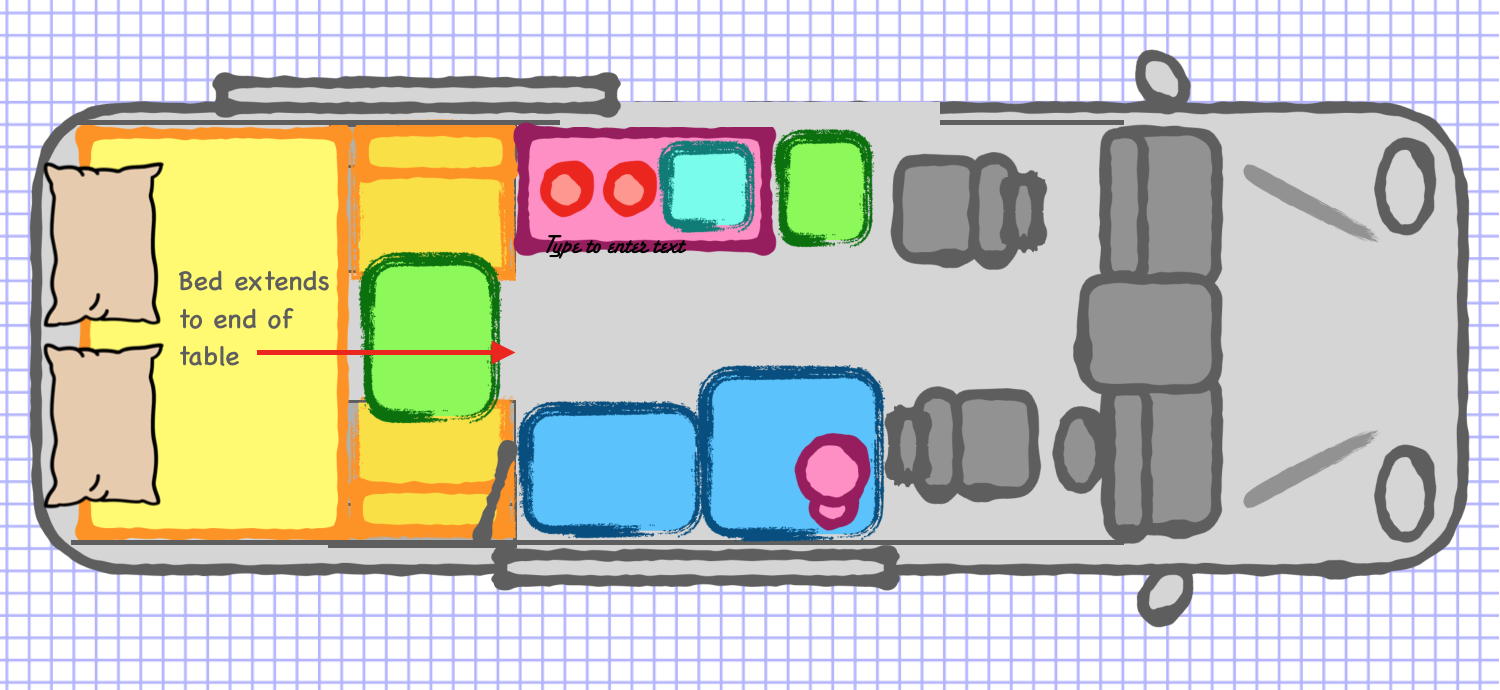
A fixed bed and mattress is a luxury usually only available in larger vans. The most common alternative is a bed that can be made up each night, usually using the day table as an add-in panel to complete the bed base, filled with cushions from the seat backrests.
A platform bed, either permanent or extendable (as in the above drawing), provides valuable storage space under the bed.
Once you have set out the location of your major fittings and appliances, mark the location of lights, power outlets, etc.
Finally, add accurate dimensions to the drawing.
If any of your fittings will require cutting or drilling through the van walls, floor or roof, check on the location of structural beams and other major fittings (such as the fuel tank) in the van body.
Once the design and layout is finalised, create a cutting list and appliances list, including costings for each item.
The Digital Option
I haven’t tried this software, but it might be worth exploring if you would like to create a 3D mockup of your van layout plan….
See also: |
DIY Fit-out | What size van? | Draw a floor plan | Cabinet materials | Fittings | 12V power