Related: Van Design & Layout | DIY Mini Projects
Campervan and Motorhome design always involves compromises. Especially in smaller vans, and nowhere more-so than in the bedding and lounge department. When planning our setup we were chasing a couple of holy grails – not having to make up the bed each night (we still enjoy traditional sheets, blankets and a doona!), maintaining a dining area, and maximizing our storage space.
The Standard Setup
Our van’s original layout included what is a fairly standard seating and bedding arrangement in vans of this size – a bench seat down each side at the rear, sliding towards the centre of the van to form a double bed (see pic below). Alternatively, the bench seats can be left in place and used as two single beds, or possibly a single bed and a lounge for solo travellers.
If setup as either a double bed or two singles, the bedding would have to be remade or rolled out each evening. A bed takes up half the floor area of a compact van’s limited space, so its setup – in particular its location and permanency – is always one of those compact van compromises.
And while we are talking about space, this standard bench design provides no storage for bulky items such as levelling ramps, chairs, fold up tables, or a Weber oven. Another compact van compromise!
Squeezing it all in
In addressing both these issues – permanent bedding and increased storage area – we planned a reconfiguration of the cabinet work in the rear area of the van. We had some of this work done by our local Campervan fit-out gurus at Campervans Australia – a huge help in sourcing matching materials and finishing the cut edges of the plywood – otherwise this is a pretty straightforward DIY project.
The plan was to close in the back section of the ‘walkthrough’ between the two bench seats and use this area as a permanent east-west bed, sleeping across the van, while retaining the forward section of the bench seats as a permanent lounge / dining area. After setting this up and testing for one night, even with our modest heights we concluded that the standard width MWB Sprinter isn’t really wide enough to comfortably sleep across. Plus, it was awkward climbing over each other to get out of the bed.
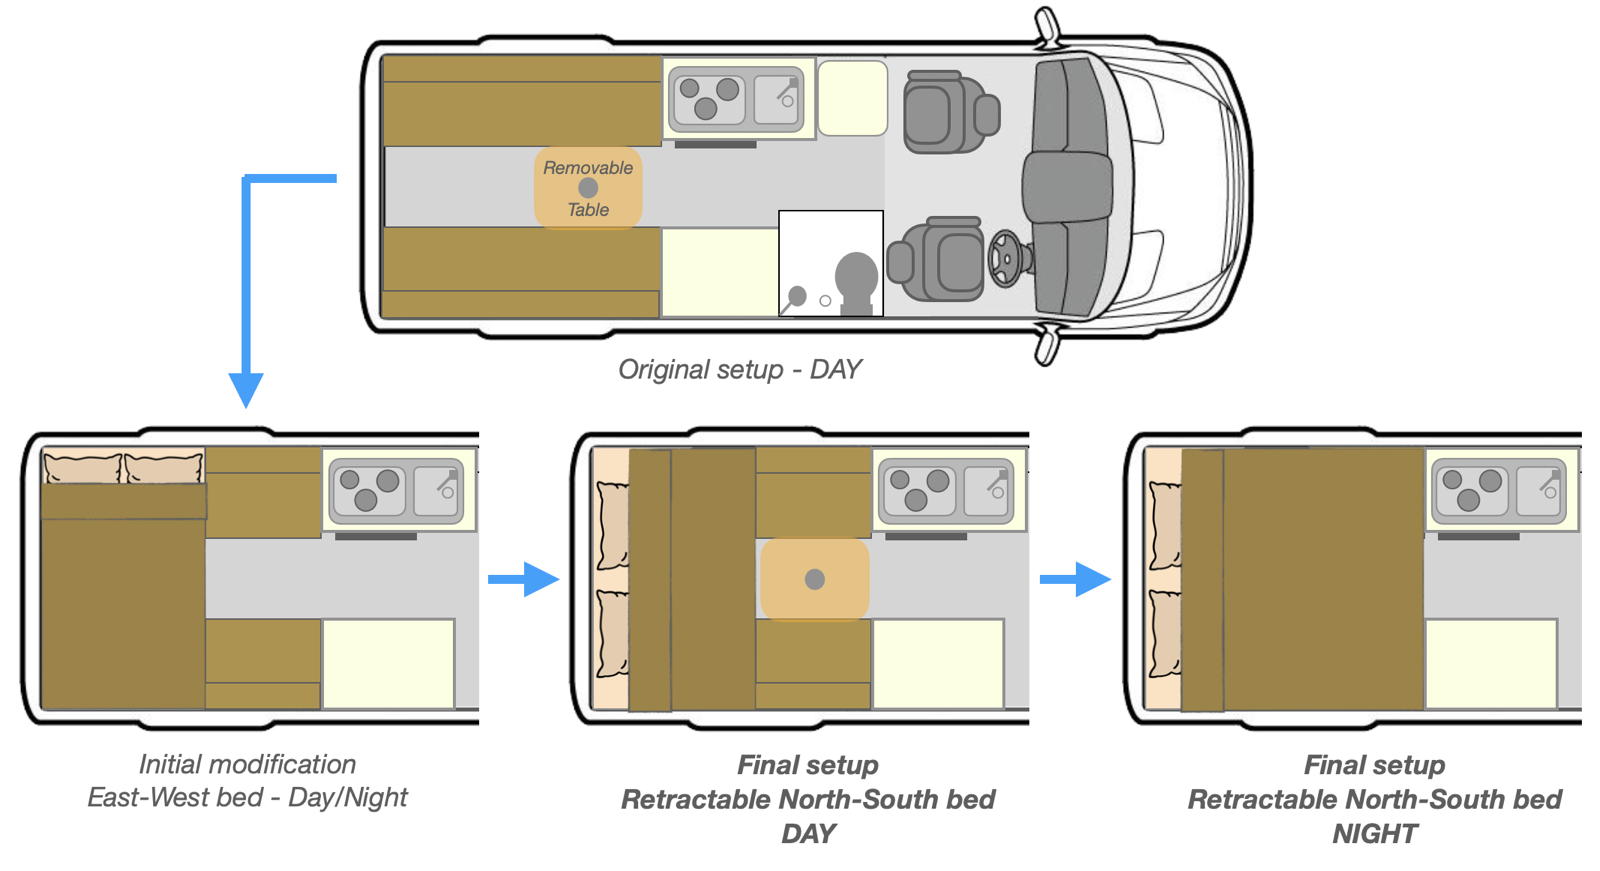
However, we felt that the ‘closing in’ of the rear area of the van to form a U configuration still had some merit. With a little more tweaking on the same base, we now have a ‘retractable’ north-south bed that can stay partly made up when the dining area is in use, while creating a permanent storage area below the bed. The best of both worlds! (Or maybe a practical compromise!)
Making it happen
Pictured below is the original bench seat structure with the cushions removed. Note that the original lid panels on the top of the benches were hinged on the outside edge of their openings. This is fine when the bench seat cushions lift from the centre of the van.
A plywood ‘rail’ has been added along the vertical wall of each bench, to support the additional central bed base boards fitted between the bench cupboards. (The material used for the modification is the same plywood with a laminate surface as used for all the cabinetwork in the van.)
The table post socket in the floor was fitted forward of the section to be closed in. If this socket had been further towards the rear of the van, it is not too much drama to fit another socket, or install an alternative table mounting mechanism.

To get started, we reversed the hinging of the bench seats so they open towards the centre of the van. This hinge reversal was important for us, with our permanent elasitcised bedding – it simplifies access to the under-bench storage when the bed is made up. (See diagram below.)

Moving the hinges to the ‘inside’ of the opening allows access to the under bench storage without dismantling the bedding. We also installed a folding strut to support the open door, leaving two hands free to remove items from the storage area.
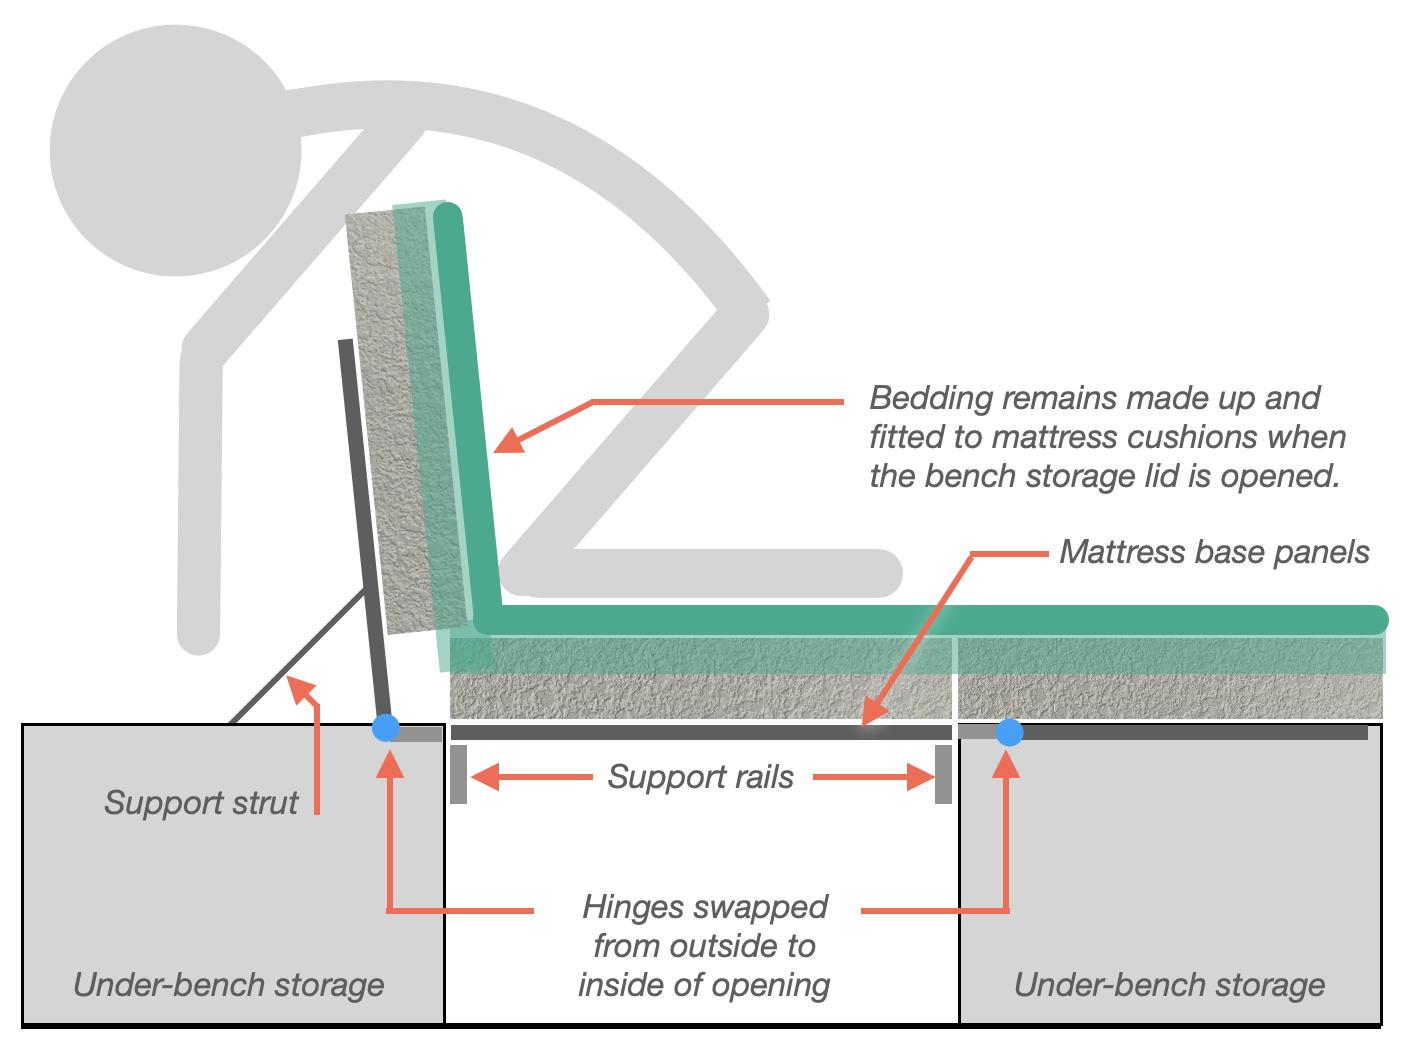
Additional holes drilled in the bench lids provide easy ‘lift and open’ access from each end of the bench.
Support rails are installed along the length of the existing bench seating to support the mattress base panels (and the table) that will fit over the storage area and support the mattress cushions (see diagram above).
A divider, fitted between the two benches, fits around the support rails and closes off the under-bed storage area. This divider panel also supports the front edge of the mattress base boards. Dowel pins prevent the base boards from sliding forward when the vehicle is braking.

The divider panel is held in place with small sliding barrel clips, allowing for easy removal of the panel to provide internal access to stored items in the under-bed boot area, or to accommodate longer items (eg snow boards) when carried in the rear of the van.

The vent in the divider panel facilitates air being drawn from the living area through to the intake of the diesel heater fitted under the left side bench seat.
Back to Base
The centre section of the bed base consists of three equal-sized boards sitting on the previously added ply support rails and divider panel.
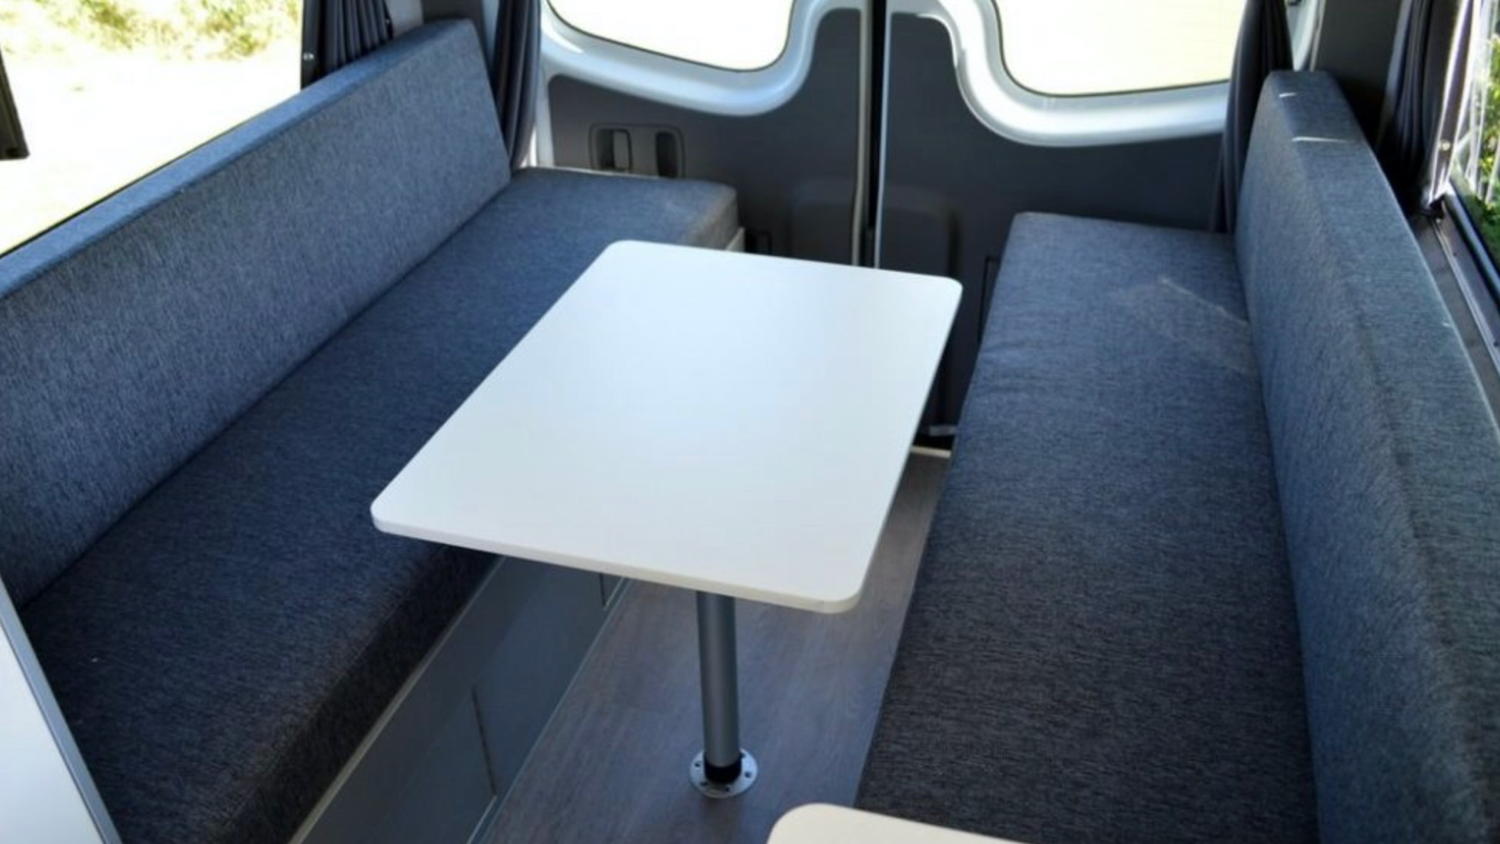
The dining table drops in to fit on the support rails at the front end of the centre area to complete the bed base. This may require re-sizing of the existing table to fit the space. Alternatively another board could be carried to drop into this section.

These boards are held in position by small dowel pins (rather than screws) to prevent the boards moving forward under braking. Being in three pieces and held in place with dowel pins, the boards are easy to remove and store when we use the van as temporary transport for large items.

Getting Cushy
We engaged an upholsterer to cut and re-cover the seat backrests to use as the narrow centre mattress cushions. These cushions can still be used as seat backrests if the bed is returned to its original ‘bench seat’ configuration.
The shorter seat backrests from the dining area drop in on top of the table panel to complete the mattress.

But wait – there’s more!
Not only do we now have a comfortable retractable north-south bed, we also enjoy the benefits of the new storage area under the bed, accommodating the Weber oven, a folding table, chairs, levelling ramps, and a fold-up solar blanket. A PVC tube stores a collapsible frame for supporting the portable solar blanket at a more productive sun-oriented angle.

Sleeping and Eating
The most important feature of the modification though is that the bed doesn’t need to be fully deconstructed to use the dining area. If we need to use the inside table and dining area we can quickly roll back half the bedding – soft top, doona, etc – lift the table and use the remaining bench seating for a dining area. The bottom end of the bed can be re-made very quickly. (We initially hoped that we could sleep across the van – east-west – and not have to roll the bed back in north-south format, but unfortunately the van is not quite wide enough for a comfortable nights’ sleep in east-west configuration.)
| [s201_bai id=”9″] |
Doubling Up
We use our van as a second domestic vehicle as well as a holiday van. Thanks to the clip-in panels, the new bed arrangement can be easily and quickly reconfigured to transport large items when required.

This relatively minor furnishing modification has improved our van’s flexibility and usability, providing a semi-permanent bed and dining area while increasing our storage capacity when travelling.
All wrapped up in our compact MWB Sprinter van!

Related: Van Design & Layout | DIY Mini Projects