Sustainability: Batteries & Solar | Water | Heating
See also: Water usage | Install a town water inlet
Shower head extension intro | Basic extension (v1) | Adjustable extension (v2)
The Plan
 Our recently-fitted town water inlet has extended our showering options – in particular using the shower in our wet bathroom like a regular ‘fixed’ shower, without the need to hold the shower head by hand, or to stop and start the water flow to soap up and rinse.
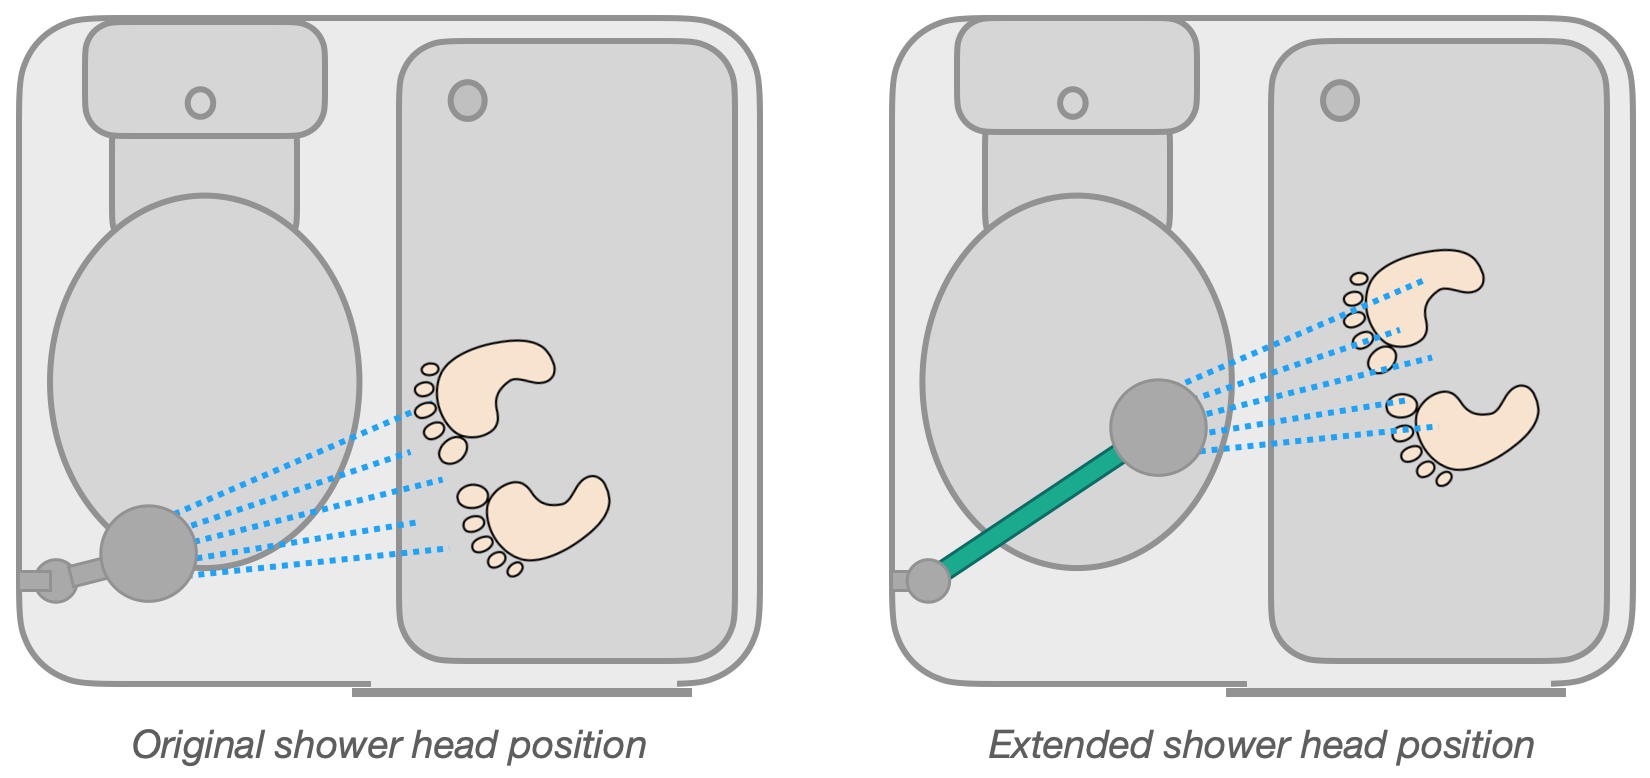
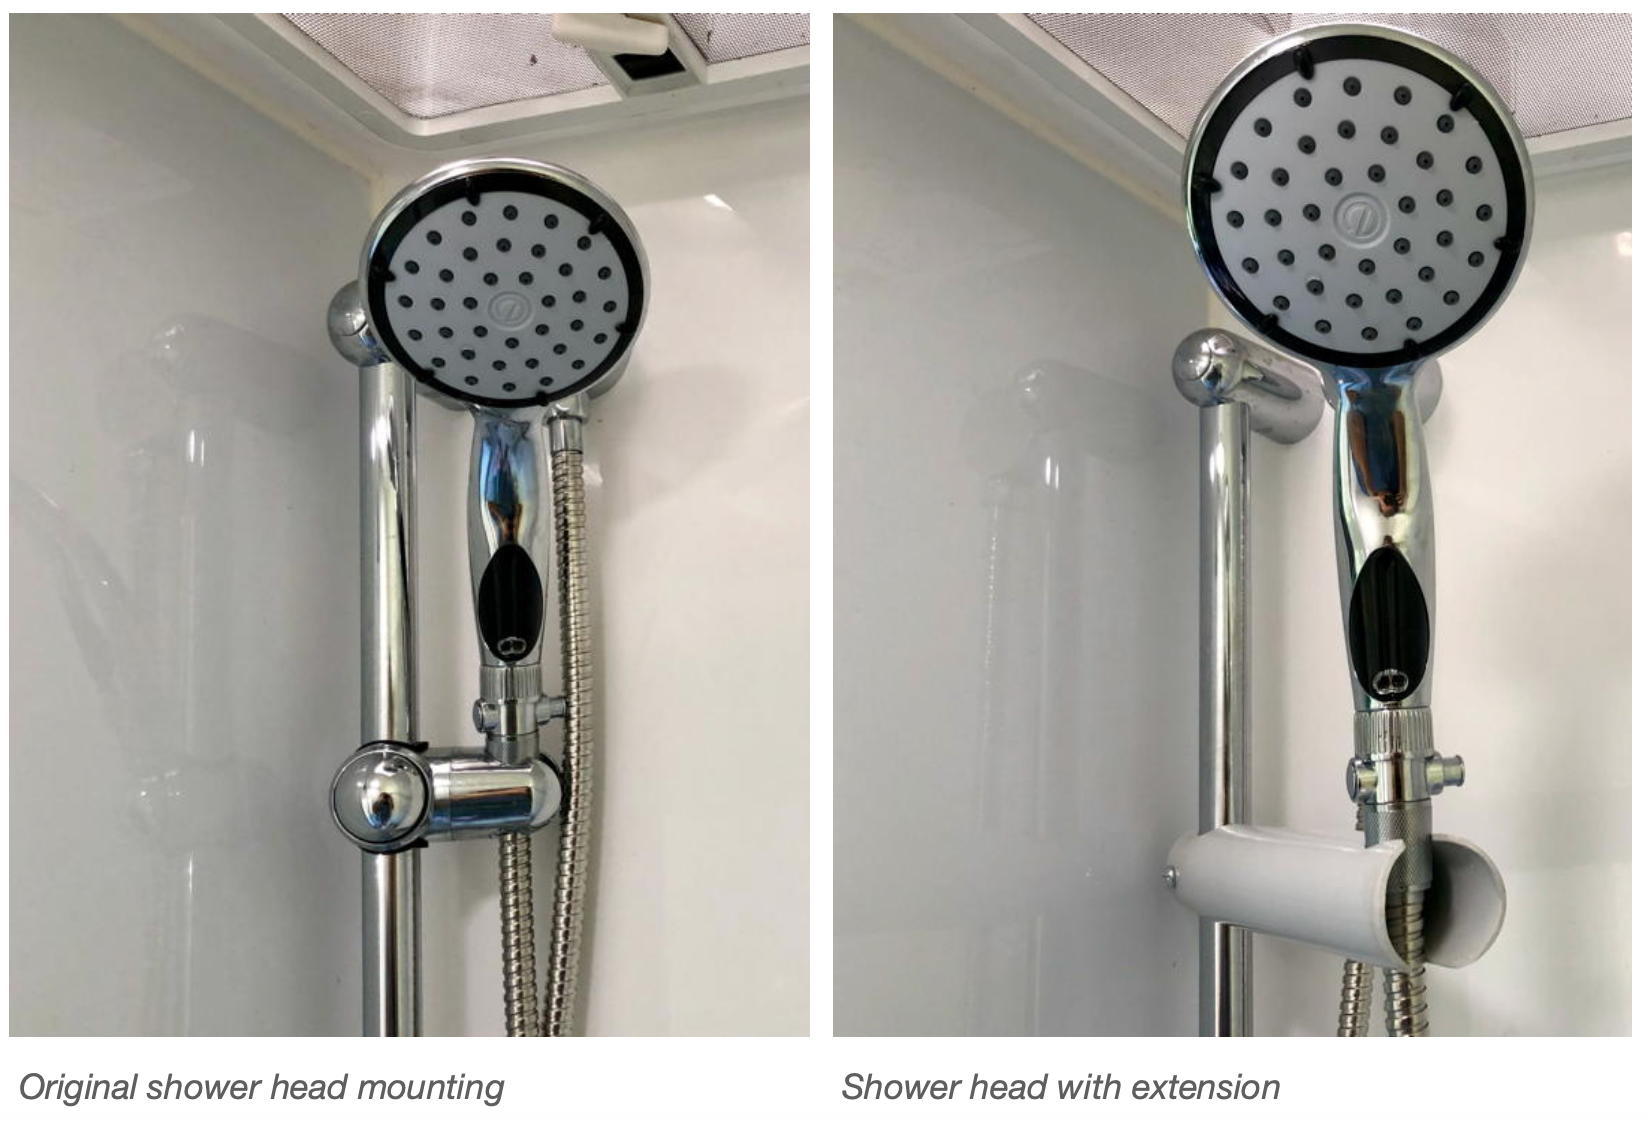
However, the default setup has the shower head mounted close to the wall on the toilet side of the bathroom cubicle. We find that this isn’t quite close enough to the shower area for a ‘stand-under’ shower, finding ourselves leaning over the toilet to get closer to the shower head.
So, we made a small extension arm on which to mount the shower head, bringing the shower head further into the cubicle. Not a huge extension, but enough to make the shower much more usable.
This was v1 – a very basic ‘extension’ made from a single piece of PVC pipe. This may be all you need. We have since upgraded to v2 – an adjustable extension arm, though the manufacturing notes below generally apply to both versions.
The original factory fitted mounting bracket was able to be rotated to bring the shower head into the cubicle a maximum of 50 mm from the vertical mounting rail. The new extension provides a maximum extension of 200 mm from the rail. Only an additional 150 mm – but it makes a good deal of difference. The extension can be rotated sideways to bring the shower head more towards the centre of the cubicle, and to reduce the length of the extension’s reach into the cubicle if required.
The sizes suggested here suit our particular setup. Depending on the many variables, a different length of extension may be more suitable for your bathroom.
Making it happen
The extension described here is made from 40 mm PVC high pressure plumbing pipe (45.3 mm OD). This material is strong and light, while being easy to drill, cut and file. It is also suitable for use a in a wet environment, and is white, rather than the grey colour of some lighter PVC pipe.

The holes to mount the shower head and attach to the rail are manufactured to suit the size of your fittings. The sizes in the above drawing suit our fittings.
The largest drill bit I have in my toolbox – suitable for drilling the PVC pipe – is 12 mm. Our fixed rail on the wall of the shower is 25 mm diameter, so I drilled a 12 mm hole in the PVC pipe (pre-drilled with a 4mm pilot hole) and filed it out to 24 mm – this only takes a couple of minutes with a suitable round file. (A conical step drill might also be suitable for opening out the drilled hole.) I cut the slip opening to the end of the pipe to 20 mm width using a hacksaw. These sizes keep the fitting snug – there is enough ‘give’ in the plastic pipe to flex when pushing it on, while keeping it snugly clamped on to the rail.
At the other end of the extension tube, the mounting hole will accommodate the tapered bezel at the bottom of the shower head handle. At its widest point the bezel is 25 mm diameter, so I made the mounting hole on the top of the extension pipe 22 mm diameter, making for a snug fit on the bezel taper. The corresponding hole on the bottom of the PVC tube is 15 mm, to accomodate the flexible hose pipe leading up to the handle bezel. The slip opening on this end of the extension tube is 13 mm. The 15 mm pipe easily pushes through this opening.
The M6 screw and wing nut (stainless steel if available at your supply shop) clamps the PVC extension post onto the vertical chrome rail in the shower, making it easy to loosen and adjust when required.
I filed a rounded dome profile on the protruding end of the tube, as much for aesthetics as well as not having any sharp edges exposed on the end on the tube.
The cut and drilled edges of the pipe all received a rub over with fine wet ‘n’ dry paper, or similar abrasive material, to remove any rough edges. Acetone can be used to remove any manufacturer printing from the pipe. I also gave the whole thing a rub over with car polish to finish it off.

The shower head now extends a suitable distance from the wall, so we can enjoy a long hot shower and wash our hair without leaning over the toilet (when connected to town water).
Initially I made the extension much shorter (135 mm reach), to extend straight out at 45º from the corner of the cubicle. The longer extension tube (200 mm) provides for more flexibility – most notably the ability to be panned sideways, bringing the water output into the centre of the shower area. There is also a hard physical limit – anything longer than the 200 mm version intrudes into the door opening space when panned to the left.
This was our ‘Version 1’ basic extension. Since then, we have installed an extendable model – Version 2!
|
See also: |
<<< Shower Head extension overview
Sustainability: Batteries & Solar | Water | Heating