See also: DIY Campervan Mini Projects >>>
DIY Fit-out | What size van? | Draw a floor plan | Cabinet materials | Fittings | 12V power
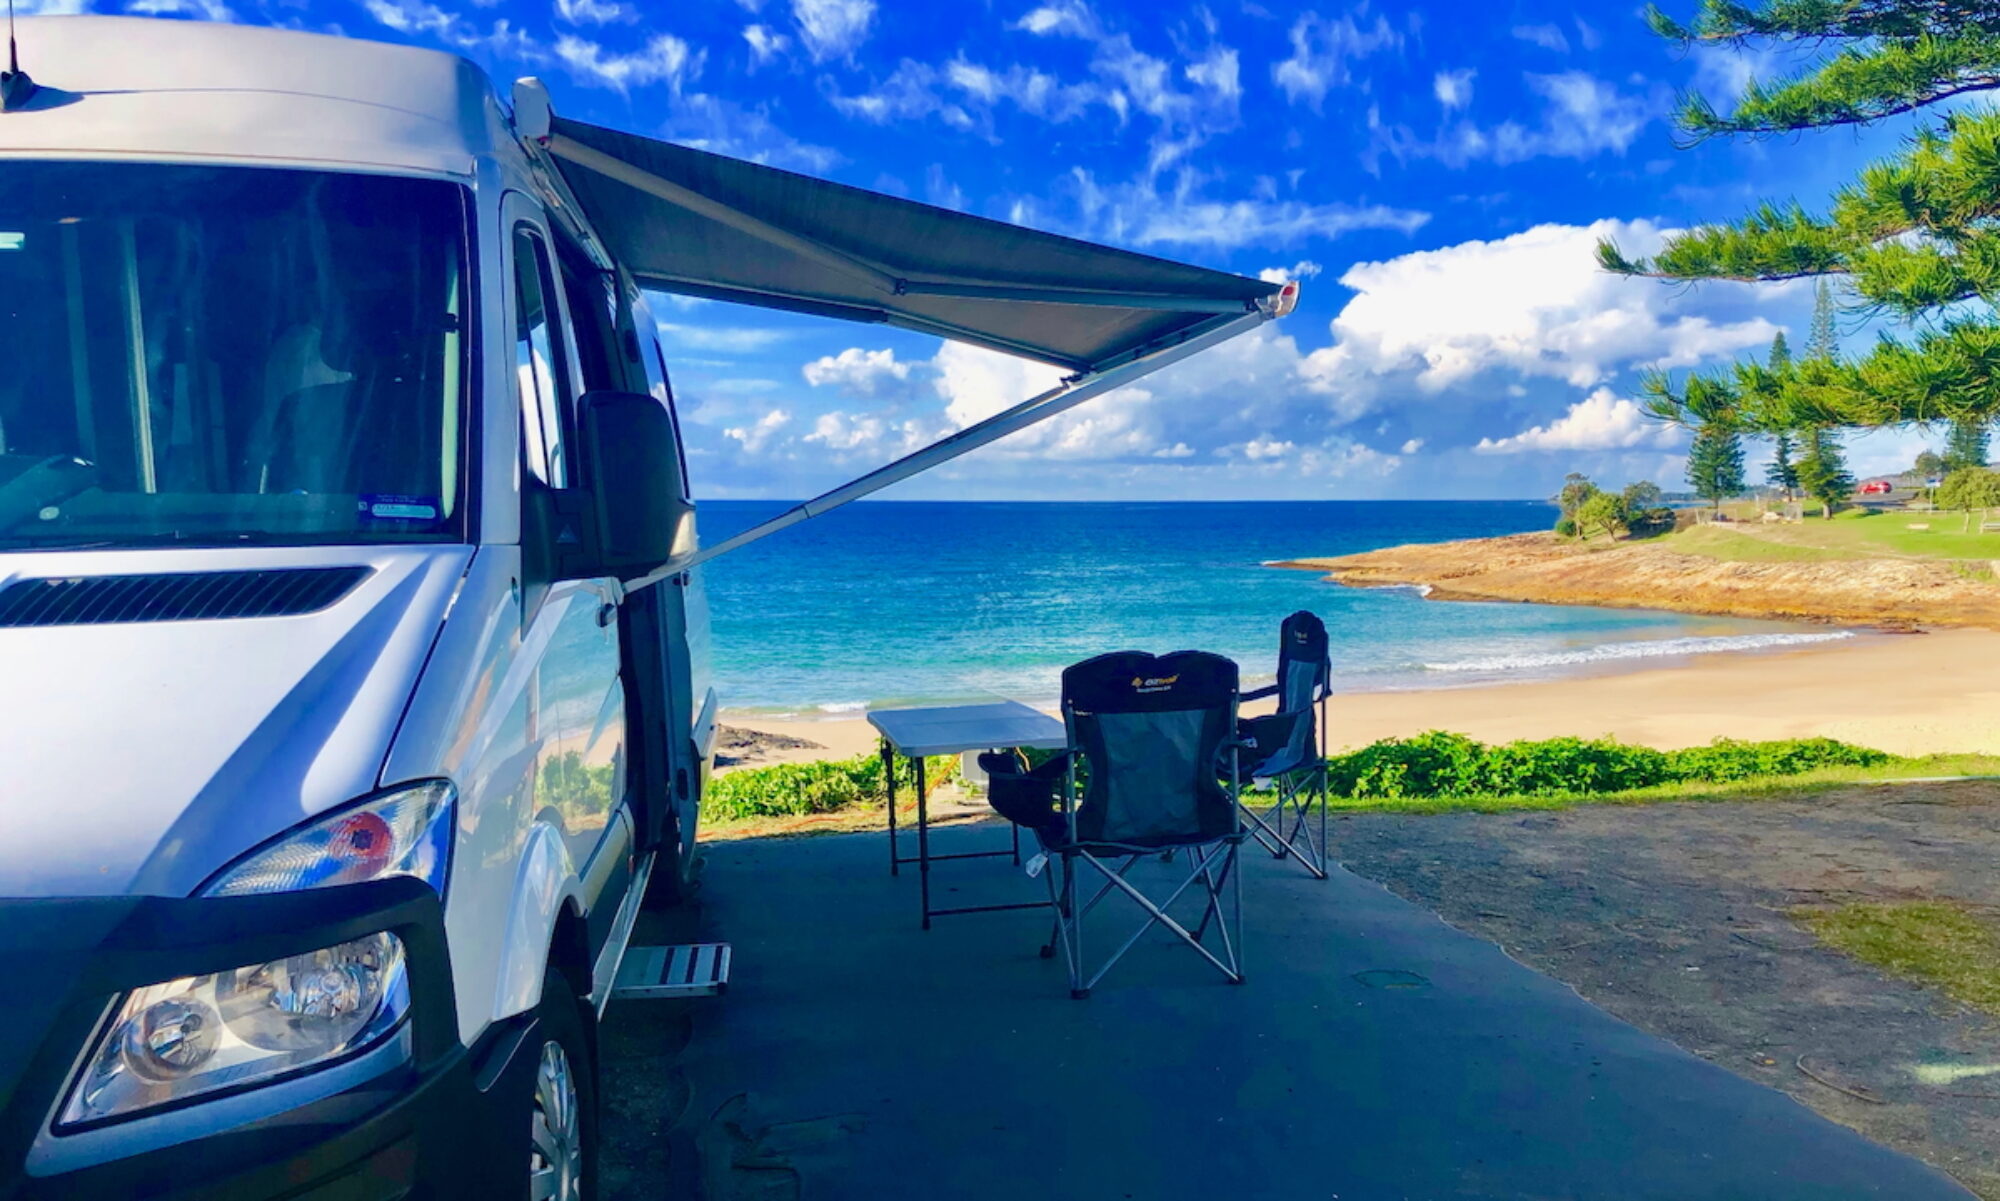
Power On
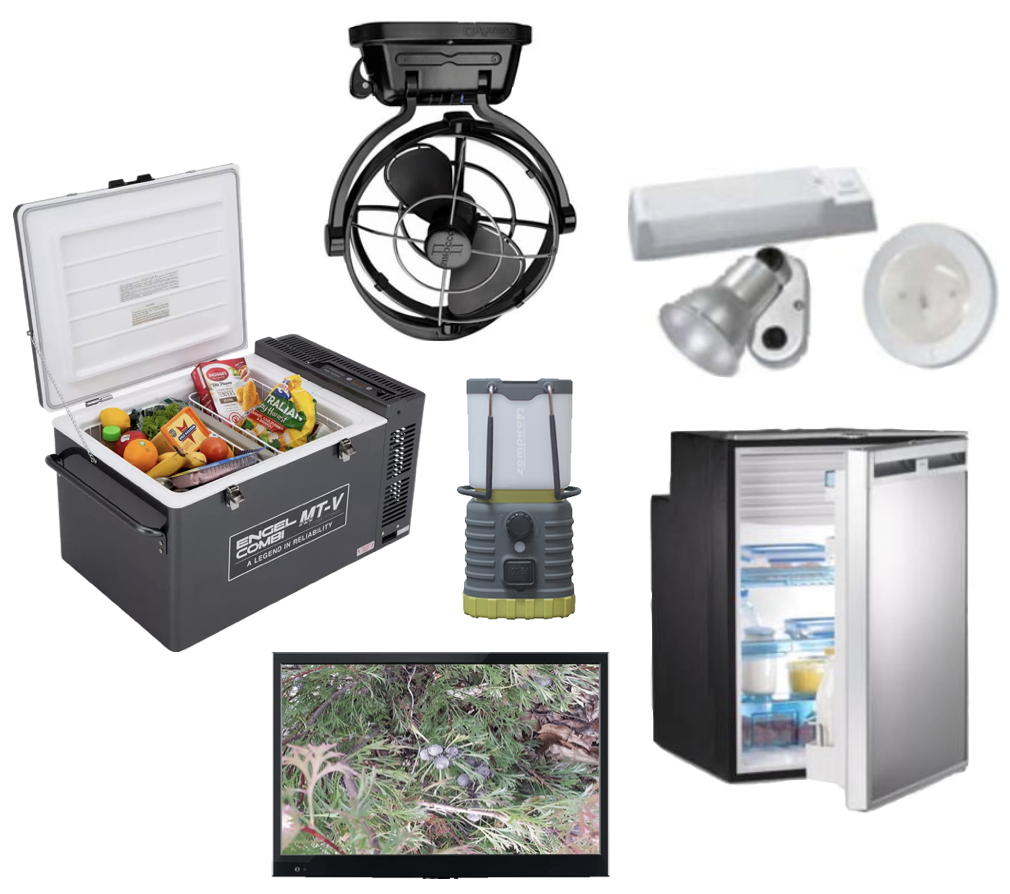 There is an enormous range of 12V appliances and accessories available for Campervans and Motorhomes, all requiring a reliable 12V power supply.
Your Campervan or Motorhome needs three things for a reliable and sustainable 12V power supply:
-
- A Battery – A deep-cycle battery with adequate stored energy capacity for the ongoing power requirements of all appliances;
- Battery recharging – Adequate battery recharging infrastructure (including appropriate regulators) to replenish the battery’s stored energy reserves from solar, vehicle alternator, or 230V AC;
- Cabling – Good quality wiring and connection of appliances and other electrical devices to the battery, so that the required electrical current can move efficiently (and safely) between the battery and those connected devices.
All these bits and pieces can be installed permanently or fitted temporarily. Regardless of which option you choose, all your 12V appliances must be connected to the power supply with suitable gauge cable and robust (and correctly fitted) cable terminators and plugs, for both safety and functionality. This is important – in some applications it is critical.
More 12V info…
|
| The Basics |
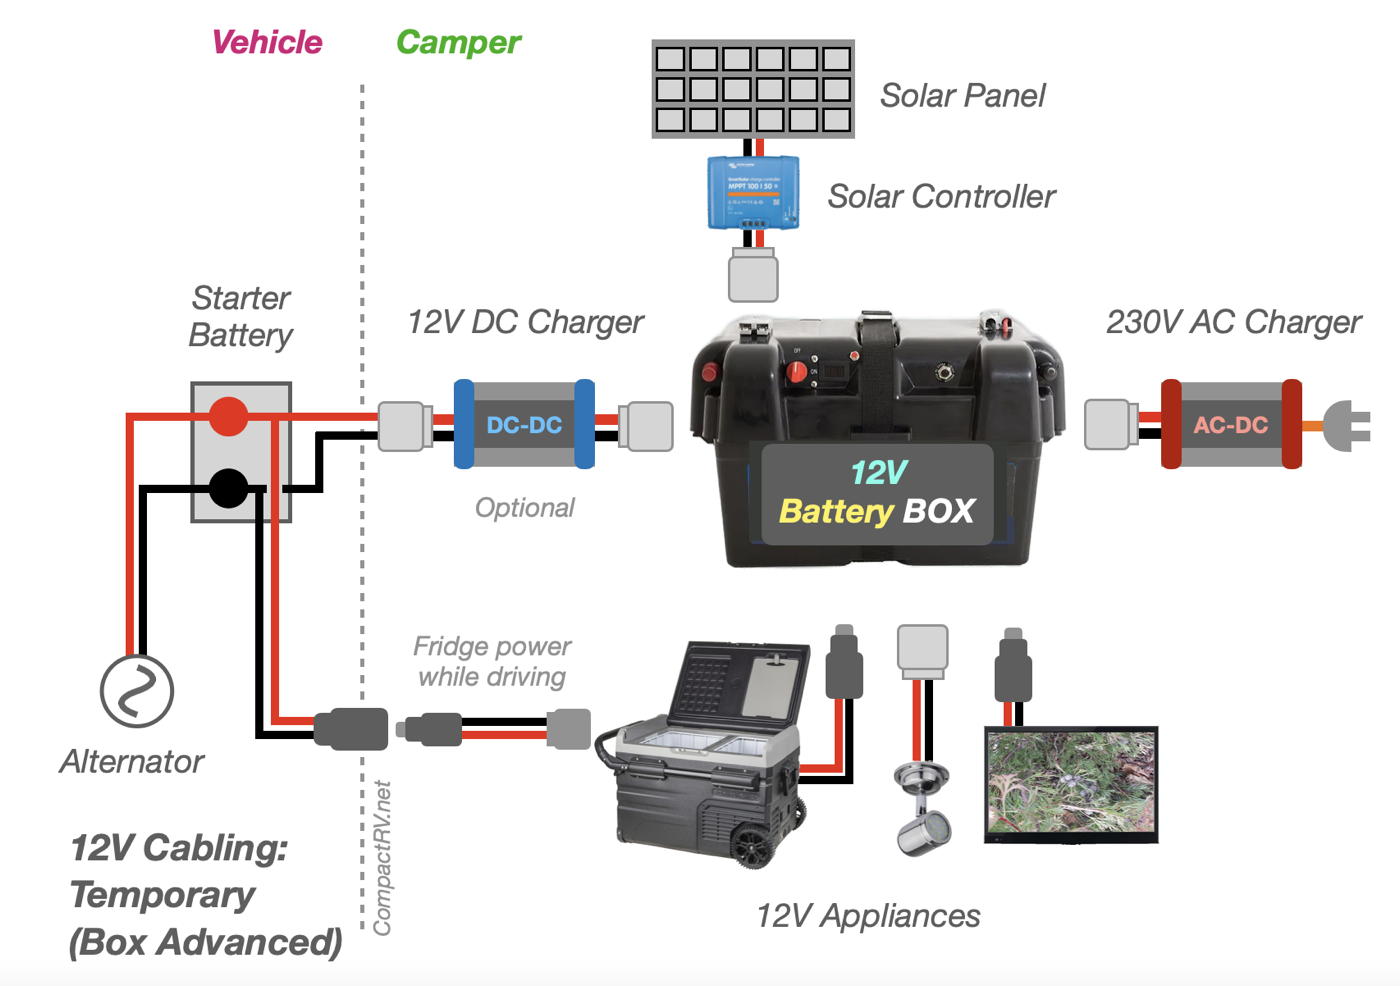
Your 12V camping appliances are powered independently from your vehicle’s starting battery, though the battery/s powering your appliances can still be recharged from your vehicle’s battery charging system using an isolator / regulator.
The video below provides a good overview of 12V off-grid equipment options. Although this video discusses the 12V setup in the back of a Ute, the principles also apply to a Campervan setup….
-
- Easy Off-Grid Camping System (Video – 4WD SupaCentre)
1. Battery capacity
Generally speaking, one or two 120Ah Lithium batteries will cover the needs of most campervan owners.
If you are staying in caravan parks most of the time, then 1 x 120Ah Lithium battery will do the job. If you plan on regularly spending nights free camping, then 2 x 120Ah batteries will cover most situations, especially if connected to a 200 Watt solar panel to recharge the battery.
If you want to do some calculations to confirm your battery needs, first consider…
-
-
- your appliances’ rate of consumption of electrical current (Amps);
- how long these appliances will be drawing this current between battery recharges.
-
This will give you a pretty good idea of the battery storage capacity (Ah) required for your time off-grid.
How much power are those appliances using? Most appliance manuals include the power draw (Amps) in the specification appendix. Multiply the amps the appliance is using by the number of hours it is running to determine the Amp Hours (Ah) of stored energy that it will consume from the battery over that period of time. Keep in mind that appliances such as a fridge only use electricity while the compressor is running, so the hourly rate of consumption will be an average figure.
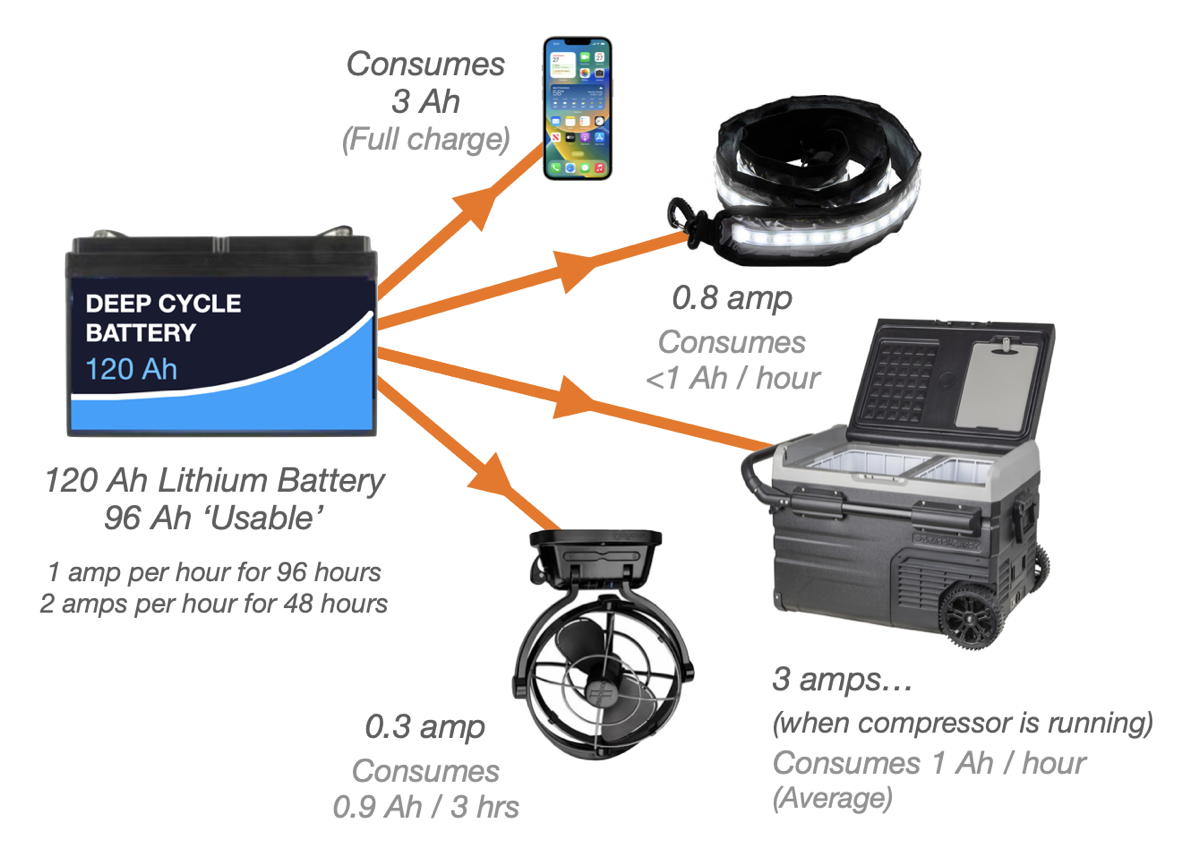
A 120Ah Lithium battery has a ‘usable’ capacity of around 96Ah (80% of specified capacity*). A 12V chest fridge drawing 3 amps (when the compressor is running) will deplete 1 Ah per hour (or less) from your battery, so you have a runtime of around 96 hours from a fully charged 120Ah Lithium battery (with no recharging). An upright fridge/freezer is more likely to consume 2-3 Ah per hour form battery stored energy.

Note: As Lithium battery prices continue to fall, a Lithium battery is now the only choice for a new battery purchase (IMHO). Lithium batteries last longer, have a more consistent discharge voltage, and are less than half the weight of AGM batteries. (See Kings 120 Ah Lithium Battery – $320 to $450 depending on ‘specials’ cycle.)
* Some Lithium battery suppliers claim 100% usable capacity. Maybe. Let’s play it safe and stick to a guideline of 80%, which will ensure ongoing battery operability and a longer life-span.
-
-
-
More info: Deep cycle campervan batteries >>>
-
-
If you are using an AGM battery, remember that it will have a ‘usable’ capacity of only 50% of specified capacity. The same 12V fridge, consuming 1 Ah per hour will have a run-time of around 60 hours from a fully charged 120 Ah AGM battery. You can estimate when an AGM battery has reached its 50% charge capacity when the voltage drops to 12.1V.
2. Battery Charging
The estimated appliance run-times above are based on the initial capacity and subsequent discharge rate of a fully charged battery. Deep-cycle batteries can be recharged to restore their capacity and significantly extend the run-time of your appliances.
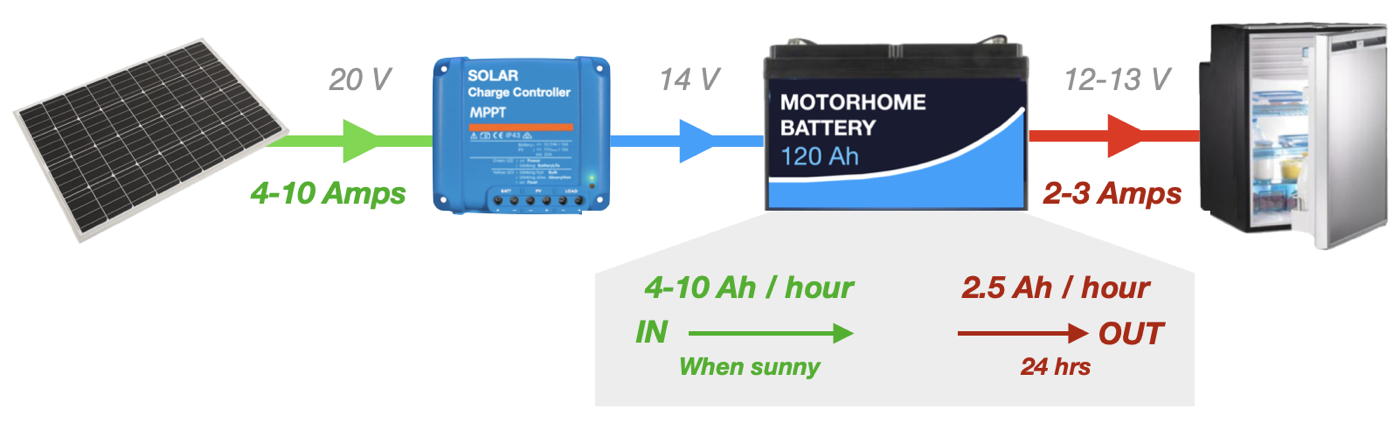
Your batteries can be recharged with electrical current generated from
-
-
- a solar panel;
- the vehicle alternator;
- a 230V AC mains supply.
-
Each of the above charging sources require an appropriate charger / regulator to feed electrical current to the battery. Battery recharging can extend your appliance run-times indefinitely, if you have enough recharging capacity.
-
-
-
More info: Appliance power consumption | Battery recharging
-
-
3. Connecting it all together – 12V cabling
 There is cabling and there is cabling. If you want reliable 12V power you MUST use quality cable and cabling techniques to hook everything together. There must be a suitable gauge cable path for electrical current to move from your battery to your appliances, and back again, without any cabling hindrances.
-
-
-
More info: 12V Wire and Cabling >>>
-
-
4. Thinking of an inverter?
Inverters are used to run portable 230V AC appliances from your 12V DC battery/s.
However, the Amps drawn from a 12V battery by domestic 230V AC appliances operating through an inverter can be huge – calculated (approximately) by dividing the power draw of the appliance (Watts) by 10. For example, a 700W toaster will draw around 70 amps, consuming around 1.2 Ah per minute from a 12V battery. The correct gauge (and length) of cabling over which current is flowing from the battery to an inverter is also critical. Think, short and heavy!

A low wattage inverter (under 1000W) connected to a battery with 100Ah or less in capacity is more suited to charging laptop computers, running CPAP machines, etc, rather than powering larger domestic appliances.
A battery’s capacity to supply a high continuous current is a consideration here too – Lithium batteries are an advantage in this scenario. Check your battery specifications for ‘continuous’ current supply, not just ‘instantaneous’ or ‘peak’ current capacity.
If you are using a Battery Box to house your battery and provide connections to appliances, check the maximum current output of the Battery Box (Amps) before getting too excited about hooking up an inverter. Most basic Battery Boxes are protected by a 30A fuse.
-
-
-
More info: Installing an inverter in our Campervan >>>
-
-
| Putting it all together | ||||
| Below are some setup options for a 12V power supply in a campervan – either a basic temporary power supply or a larger, permanently installed setup. | ||||
| * Prices are approximate and are in AUD | *Links are to examples of the device category | ||||
| 12V Power – Option A: | Portable Battery Box | |||
|
Powered Battery Boxes hold your battery securely, providing external connections for Anderson plugs, 12V cig sockets, USB sockets, and screw terminals. They are also fitted with a voltmeter, which can be used to estimate how much charge you have left in the battery. If you fit an AGM battery, and include a 230V charger in your kit, a Battery Box option is probably the cheapest portable 12V power option. However, AGM batteries are heavy – a Lithium battery is a much better option, even though a little more expensive. For overnight or weekend trips, running only a fridge and mobile phone charger, it is likely that, with decent battery capacity, you may not need any on-site re-charging….
See also: Portable fridge & 12V power on the go >>> For longer trips, a solar panel and/or 12V DC-DC charging facilities will provide longer battery runtime….
|
||||
|
|
||||
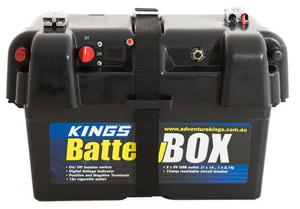 |
Battery Box – Option 1Adventure Kings Battery Box – (Holds 120Ah AGM or Lithium battery) – Includes 2 x 30A Anderson plugs, 2 x USB outlets, 1 x 12V cig socket, 2 x screw terminals, 1 x Voltmeter, isolation switch, resettable circuit breaker. (~$60) |
|||
|
|
||||
 |
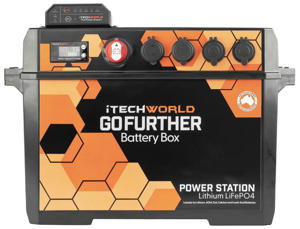
Battery Box – Option 2iTechWorld GoFurther Box – (Holds 120Ah AGM or Lithium battery) – Includes 1 x 175A Anderson plug (for Inverters, etc), 4 x 50A Anderson plugs, 3 x QC 3.0 USB outlets, 1, USB-C outlet, 2 x 15A 12V cig socket, 2 x screw terminals, 1 x LCD screen, isolation switch, 2 x 50A auto-reset circuit breakers. (~$300) |
|||
|
|
||||
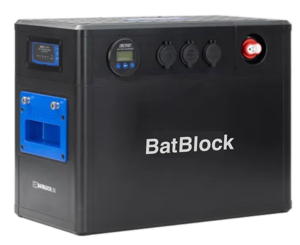 |
Battery Box – Option 3Kings BatBlock25 – (Holds 120Ah AGM or Lithium battery) – Includes 1 x QC solar input, 1 x Alternator input, 2 x 50A Anderson plugs, 2 x USB A, 2 x USB-C outlets, 1 x 15A 12V cig socket, 2 x screw terminals, 1 x LCD screen, isolation switch, 200 A fuse. (~$670) |
|||
|
|
||||
 |
Battery Box – Option 4iTechWorld GoFurther Box & Charger – (Holds 120Ah AGM or Lithium battery) – Includes a 25A DCDC Charger (with 1 x Triple Anderson plug for DC-DC ignition source input & 1 x 50A Anderson plug for DC-DC MPPT solar input), 1 x 175A Anderson plug (for Inverters, etc), 4 x 50A Anderson plugs, 3 x QC 3.0 USB outlets, 1, USB-C outlet, 2 x 15A 12V cig socket, 2 x screw terminals, 1 x LCD screen, isolation switch, 2 x 50A auto-reset circuit breakers. (~$600) |
|||
|
|
||||
| However, if you are considering purchasing a Lithium battery, with AC and DC chargers, and maybe an inverter, along with the various plugs and fittings required, plus vehicle installation, it may not be worth the effort (and cost) when compared to the simplicity and functionality of a Portable Power Station…. | ||||
| 12V Power – Option B: | Portable power station (the easy option!) | |||
|
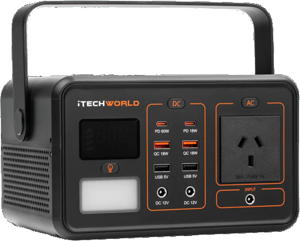
These power stations have become a more widely available option in recent times with the advent of affordable Lithium batteries and good quality power inverters. A portable power station provides a reliable 12V power supply for your fridge and other 12V accessories (lights, fan, etc), along with the option of 230V for small appliances (like a sandwich press) and USB charging points for all your portable devices – as well as all the required built-in infrastructure for re-charging the power station battery from the vehicle alternator, a 230V mains supply, or a solar panel – all contained in a single portable box. They can be used during the week for power on a worksite or in the back yard, then double up as a camping power supply on the weekends. Larger models can even run your domestic household appliances (eg – freezer) for short periods in the case of a power outage. The only decision to make is how big do you want to go (and how much money do you want to spend).
|
||||
|
|
||||
 |
||||
|
|
||||
 |
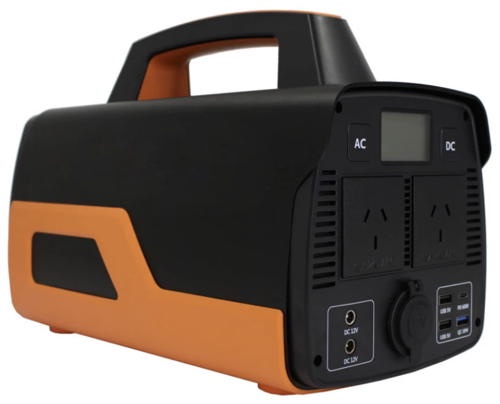
Power Station Option 1 |
|||
|
|
||||
 |
Power Station Option 2 Self-contained Lithium power station – 50Ah – A medium capacity Lithium ‘Power Station’ for longer run times for refrigerator, LED lights, fans, etc. Includes an AC inverter (PSW – 500W) and a variety of 230V, 12V and USB outlets. Recharge from 230V, car, or solar. (~$900) |
|||
|
|
||||
 |
Power Station Option 3 Larger capacity portable power stations are also available, but they do become expensive! See Goal Zero >>> |
|||
|
|
||||
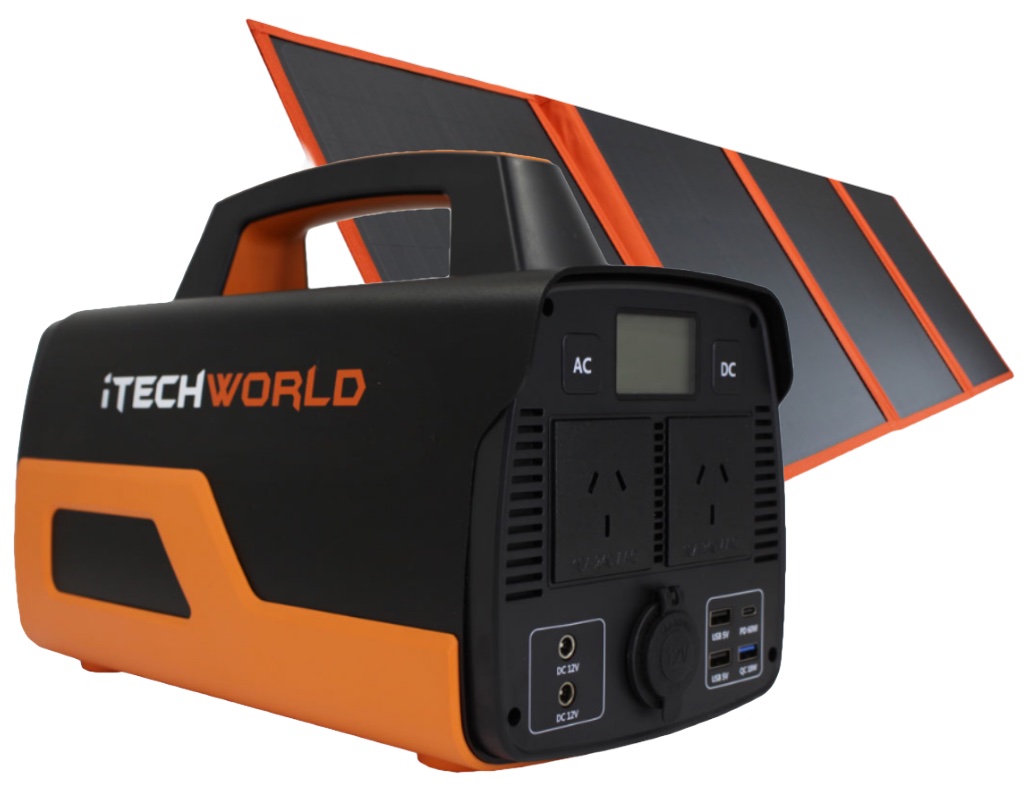 |
Power Station Option 4 Lithium power station (50Ah) + Solar panel – Combine a self contained power station, built around a Lithium battery with a built-in 230V inverter, and a 200W solar blanket. Outlets for 230V AC, 12V DC and USB. Built-in lithium battery recharges from solar / 12V / 230V (~ $1500+ AUD) |
|||
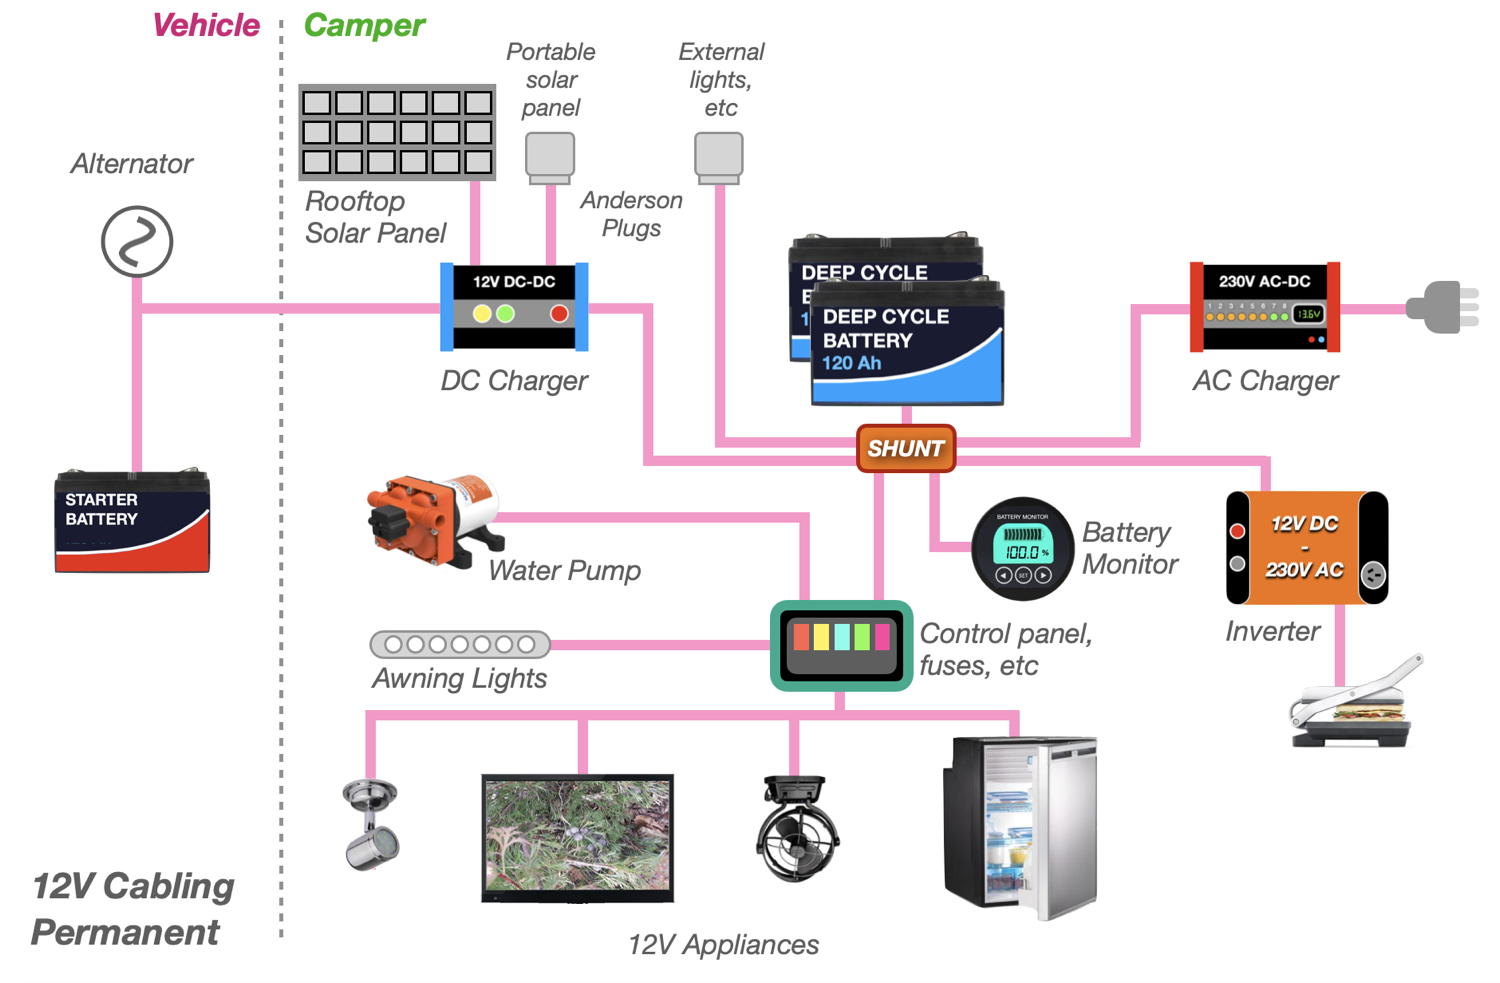
| 12V Power – Option C: | Permanent battery and charging installation | |||
|
For a more permanent setup, a battery (or batteries) can be fitted in a cupboard (in a sealed compartment, with an external vent) and wired permanently into the electrical system of the van. This is the most common setup in a Campervan or Motorhome. In addition to the battery/s you will need a battery charger and wiring infrastructure to connect your camping batteries into the electrics of the vehicle, to provide for the alternator to charge the batteries when the engine is running. Note: As a result of Australian Design Rules (ADR) introduced in late 2022, you will need a vented ‘battery closet’ in which to mount and store the battery/s, so they are sealed from the house area of the van, and vented to outside the van. |
||||
|
|
||||
 |
||||
| More Info…. | ||||
| Batteries | ||||
|
You basically have two options for a permanent battery – an AGM battery or a Lithium battery. Lithium is the way to go if you can afford it. They cost from $350 to $800 for a good quality 120Ah battery compared to around $250 for a similar capacity AGM battery. But they are half the weight (no lead) and provide a more consistent and longer lasting 12V power supply. |
||||
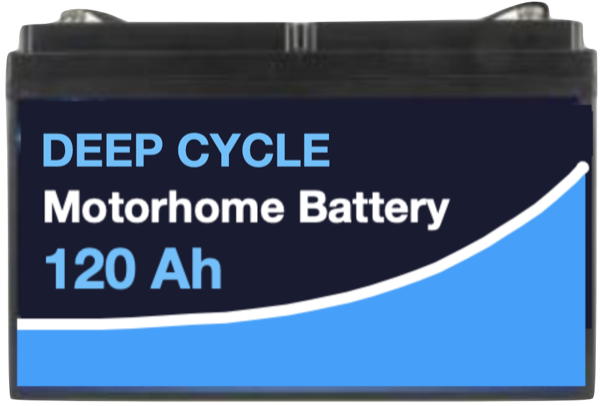 |
Option 1 Permanent battery – 120Ah – A permanently fitted deep-cycle AGM or Lithium ‘house’ battery (100Ah+) will power a 12V fridge, lights, TV, water pump, etc. ($200 for AGM or $350 to $800 for Lithium). Recharge from alternator, solar panel or mains power. (Battery chargers/regulators required). |
|||
|
|
||||
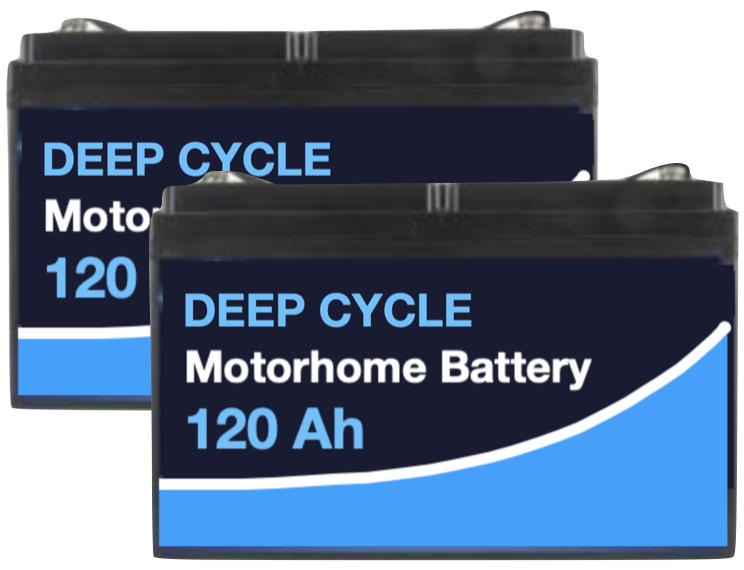 |
Option 2 Single 200 Ah and 300 Ah Lithium batteries are also available – check the installation space you have available. |
|||
| Battery Recharging | ||||
|
Your battery/s need to be recharged to maintain their energy supply. Each of the options below can be used to recharge your house battery/s. A combination of all the options below will provide flexibility to be able to recharge your battery/s in various environments.
|
||||
|
|
||||
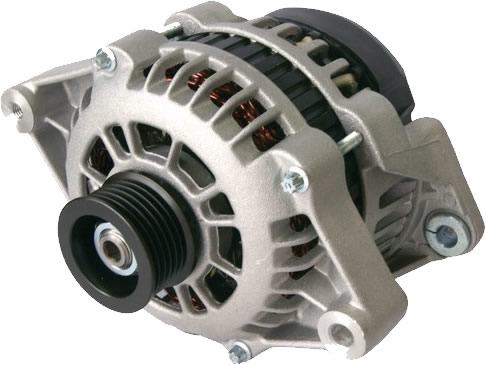 |
Option 1 Vehicle Alternator – Your vehicle’s alternator is charging the starting battery whenever the engine is running. Harness the output from your alternator (via a suitable isolator/regulator) to recharge your Campervan house battery. Read more about Battery Charging >>> |
|||
|
|
||||
 |
Option 2
|
|||
|
|
||||
 |
Option 3 Important: Mains power connections to your van must be installed by a licensed electrician. |
|||
| Charging regulation | ||||
| You need a battery charger / regulator to adjust the output of the charging source (solar panel, alternator, 230V AC) to suit the charging requirements of the battery/s. | ||||
|
|
||||
 |
Option 1 – Solar panel only Look for an Anderson plug connection rather than alligator clamps to connect to the battery. Not required if you are using a power station that has a built-in solar charger. |
|||
|
|
||||
 |
Option 2 – Vehicle alternator + Solar panel
|
|||
|
|
||||
 |
Option 3 – Mains Power Important note: Mains power installations must be carried out by a licensed electrician, with an appropriate circuit breaker installed.
|
|||
|
|
||||
 |
Very basic – Vehicle alternator only |
|||
| The Hookup | ||||
|
Nothing else matters if you don’t get this right… Installing a battery, a charger, a solar panel and a fridge is the easy part. Connecting it all together requires careful planning, based on an understanding of good electrical installation practice.
|
||||
| Other stuff | ||||
 |
Gauges, panels & outlets – Use a distribution panel with a built-in voltage meter to monitor your battery state of charge (AGM batteries) and to provide outlets to connect various portable devices. Wide variety of options available. From $100. | |||
|
|
||||
 |
Fitting a Battery Monitor – Check % battery charge (SoC), incoming and outgoing current, voltage and remaining battery capacity. Can be used for both AGM and Lithium batteries. ($50 – $200) | |||
|
|
||||
 |
Inline Power Meter – Connect between your portable solar panel / regulator and battery to measure how much current is being returned to the battery from the solar panel. ($30) | |||
|
|
||||
 |
Installing an Inverter – Run 230V appliances from your 12V power supply. (There are some limitations – read more here.) ($200 – $1500) | |||
|
|
||||
 |
Fuse box – Provide a fuse link for each permanently installed 12V appliance. Various options available from most RV parts shops. | |||


 If you are planning on a basic van setup, with a bed, a fridge and a portable water supply for weekends away, then a self-contained power station is without any doubt the easiest way to get up and running with a reliable 12V power supply.
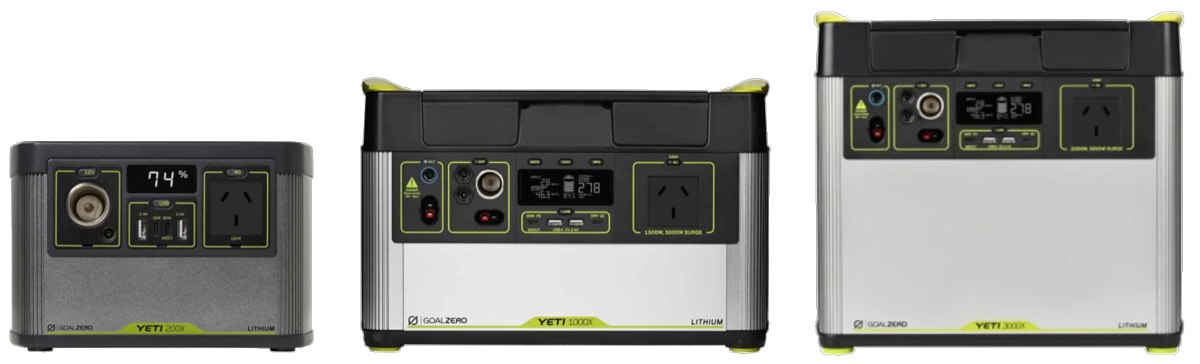
More detailed info about a sustainable 12V power supply:See also:
|
DIY Fit-out | What size van? | Draw a floor plan | Cabinet materials | Fittings | 12V power