
<<< DIY Campervan Mini Projects
See also: DIY – Portable 12V Power Supply & Fridge
| Why a Battery Monitor? | ||
|
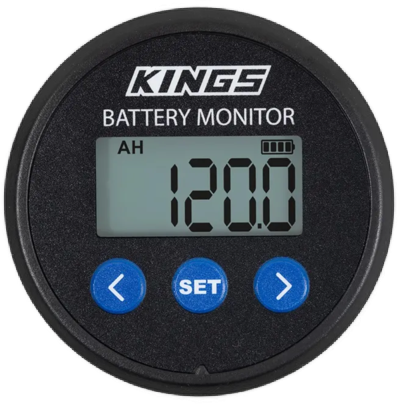
Short answer…… a Battery Monitor provides an accurate measurement of the State of Charge (SoC) of your battery – or how much stored electrical energy is left in your battery. Which a Voltmeter can’t do if you have a Lithium battery. The Voltmeter in a battery box provides (as the name suggests) a measurement of only the battery’s voltage. While voltage can be a useful indicator of the SoC of an AGM battery, it isn’t too much help in assessing the SoC of a Lithium battery, which maintains a steady voltage as it discharges. A Battery Monitor with a shunt will display exactly how much stored energy remains in your Lithium battery (SoC), in both Amp hours (Ah) and as a percentage (%) of the battery’s capacity. The battery’s voltage (V) is also displayed by a Battery Monitor, as well as how much current is moving into and out of the battery (Amps) – so you can see how much current is being used by appliances or how much current is being supplied by a solar panel or other charging sources. A Battery Monitor makes all this info available at the touch of a button – regardless of whether you have an AGM battery or a Lithium battery. |
 Most basic Battery Boxes with 12V power outlets are fitted with a Voltmeter. So why add a Battery Monitor?
A Lithium battery changes everything
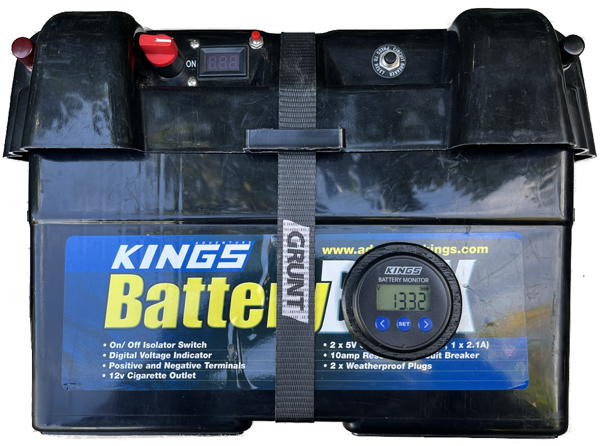 Over the years we have used an AGM battery in a wired Battery Box as a portable power supply for a 35L camping fridge.
The Voltmeter on the battery box has helped to provide an estimate of the State of Charge (SoC) of the AGM battery – the voltage of an AGM battery declines at a linear rate that reflects the battery’s SoC.
We recently replaced our AGM battery with a Lithium battery. This makes the Battery Box so much more ‘portable’, reducing the weight from over 30kg to under 15kg – much easier (and safer) to lift into and out of vehicles. The Lithium battery has also considerably extended the run time of our portable fridge – at least 5 days in mild weather, if the battery is powering only the fridge. (Of course, much longer run time if the battery is being recharged with a solar panel.)
However, given the relatively constant voltage of Lithium batteries as they discharge, the Voltmeter in the Battery Box can’t be used to provide a useful estimate of the SoC of the new Lithium battery as it discharges. (Until it discharges to 20% SoC, after which point the voltage declines much faster.)
But all is not lost – a Battery Monitor with a shunt can measure the incoming and outgoing current from a battery, and use this information to provide a reasonably accurate estimate of a Lithium battery’s SoC as it discharges, along with other useful electrical information.
So, after our experience of installing and using a Battery Monitor and shunt in our Campervan we have fitted a similar device to our Battery Box.
|
Please note….
There are Battery Monitors and Battery Boxes available from other suppliers that will do the same job as the Kings items discussed here.. We just happened to already have a Kings Battery Box, and the Kings gear is readily available across Australia. Only consider undertaking this DIY project if you have suitable tools, skills and knowledge to complete the project. Incorrectly fitted electrical components can cause overheating which may result in a fire. Ready-made alternatives |
So, let’s get started….
Here is what you will need…
(Kings prices vary depending on weekly/monthly ‘specials’)
-
- Lithium Battery (eg – Kings 120Ah Lithium Battery) ($300 – $450)
- Wired Battery Box (eg – Kings Battery Box) ($40 – $60)
- Battery Monitor and shunt (eg – Kings Battery Monitor & Shunt) ($50 – $90)
- Heavy gauge Black and Red cables with terminal rings (6 or 8 AWG) (See notes below)
- Light gauge Red cable with inline fuse holder and 1 amp fuse. (See notes below)
- 6mm marine plywood
- Screws, cable ties, etc.

Plus these tools….
-
- Electric drill
- Jig saw
- Drill bits
- 54 mm hole saw (Check your particular monitor’s mounting requirements)
- Clamps
- Spanners, screwdrivers, pliers, wire cutters, files, sand paper, paint, etc
- Plywood/timber off-cut (see notes below)
How does it all work
All the equipment used in this project is available from Adventure Kings, either in-store or on-line. Watch the Kings videos below for a comprehensive overview of general battery monitor and installation procedures. (Similar products are available from other retailers.)
It is also highly recommended to fully read and understand the information provided in the manual supplied with the Battery Monitor.
| What is a Shunt? | ||
|
A shunt is an accurate, very low resistance resistor – in the order of 0.002 ohm – which is placed in-line in the negative cable from the battery, so that all the current going out of the battery (discharging) or into the battery (charging) must pass through it. The tiny voltage drop through the shunt due to its resistance is measurable, but so small that it does not have any impact on connected appliances. Using Ohm’s Law (V = I x R) a calculation can be applied, based on the measured voltage drop (V) and the known shunt resistance (R), to calculate the amount of current (I) going through the shunt. This net current in/out measurement can be used to calculate the SoC of the battery, based on the known capacity. Shunts used with battery monitors are specified with a maximum current rating. This is particularly relevant if you are using an inverter in a multi-battery environment. For use with a single 120Ah battery in a Battery Box, the Kings 500 Amp shunt has way more than enough capacity. A 120Ah Lithium battery can only supply around 100 Amps of continuous current through a direct connection. Much less (30 Amps) through the fused cabling in a Battery Box. |
 A shunt is the brains of a battery monitor.
Putting it all together….
There are four steps in completing this DIY project…
-
- Shunt – Fitting the shunt in the lid
- Display – Fitting the monitor display in the front wall of the box
- Hook up – Connecting it all together
- Calibrating – Setting the monitor to match your battery specs
It should only take a couple of hours to put together, plus time to collect all the parts, and time for the paint to dry on the spacer ring.
Here is a quick ‘before and after’ circuit overview (click/tap for a larger view)….

Step 1 – Fitting the shunt in the lid
The info below refers to a Kings Battery Box, but others should be similar…
-
- Open up your battery box.
- Remove the battery and separate the lid from the main box.
- Remove the inner cover from the lid of the box to expose the internal cabling.
- Fit the shunt under the lid using button head stitching screws with a wide head. You will need to use a drill to increase the size of the existing mounting holes in the shunt body so as not to crack/split/damage the perspex block with larger screws.

- Connect the data cable and the temperature monitor cable to the shunt as described in the video above. The temperature monitor cable can be connected to the negative terminal on the lid.
- Connect a light duty red power cable with an inline fuse to the appropriate terminal on the shunt. (See video above). We couldn’t find a ready-made fused cable to purchase, so we purchased a cable adaptor set from Jaycar – which includes a fused cable with ring termination – and cut off the red fused cable to use on the shunt. (The power cable connector terminal on the shunt is a bit fiddly/tricky – it is definitely easier to connect this cable to the shunt before fixing the shunt to the lid.)
- Connect the ring terminal end of the fused cable to the switched side of the battery box’s on/off switch, so that power will be disconnected from the shunt when the battery box power switch is turned off. (The Kings monitor manual indicates that user settings are retained in the monitor’s memory after a power interruption.)
- Now the main bit – connecting the heavy duty negative power cables to the main shunt terminals. The existing cables in the Kings Battery Box are 8 AWG. When fitting any additional cables use at least 8 AWG gauge cables. (The old inverter cables we have used are 6 AWG.) Important – watch the video above for details of connecting the negative ‘Product’ and ‘Battery’ cables to the P- and B- terminals on the shunt respectively …..
- Existing negative battery cable: Connect the ‘battery end’ of the existing negative battery cable to the P- terminal on the shunt. Leave the other end as originally installed – connected to the main negative ring-connect output terminal.
- Additional negative battery cable: Connect one end of your new heavy duty black cable to the B- terminal on the shunt. The other end of this cable can be fitted with the rubber terminal cover to be connected to the battery when the assembly is complete.
- Hunting through the spares box we found suitable red and black cables left over from a previous project. These cables are 6AWG, a little heavier than the cables already installed in the Battery Box, but also a little longer. We used the black cable to connect the B- terminal of the shunt to the battery (as discussed above) and took the opportunity to replace the existing short red positive battery cable in the battery box with the slightly longer red cable from the spares box, so that the lid can be more easily removed from the box when required. (Cables like these cables at Amazon may be suitable for this project. Check eBay, Supercheap, Repco, etc too.)
- When your re-cabling is complete, there should only be one cable connected directly to the negative terminal of the battery – and the other end of this cable should be connected to the B- terminal of the shunt. Any other ‘negative’ cables – connected to Anderson plugs, Cig sockets, ring terminals – should be connected (directly or indirectly) to the P- terminal of the shunt. The current flowing through any negative cables not connected to the P- terminal of the shunt will not be measured by the shunt/ battery monitor.
- Re-fit the lid’s internal cabling cover.
Step 2 – Fitting the Monitor Display to the Box
-
- You will need a 54mm hole saw to drill the hole to mount the monitor display. (Check the size required for your particular monitor.) We have mounted the monitor on the front of the box, but it may also be possible to fit it to the top or the end of the box. Check the mounting space under the lid. (See a couple of alternate location options at the bottom of this page. IMHO it would be more difficult to drill a hole in the lid considering all the wires that are fitted there.)
- Use the hole saw to drill a hole in the front of the box. We centred the hole on the ‘O’ in the word ‘BOX’ on the label. Clamp a timber or plywood offcut behind the plastic when drilling the hole, so you have something solid to drill into…
![]()


-
- Now, we could fit the monitor display directly in this hole, but the rear space is very cramped (against the battery), and the jamming of the monitor cables between the battery and the monitor will most likely compromise the cables over time. So, I suggest making a spacer ring to move the display out from the box just a little….
- Use 6mm thick marine plywood. (The total thickness of the mounting panel should be no more than 10mm, according to the manual.)
- Fabricate a suitable spacer ring from the 6mm ply, using the 54mm hole saw for the internal hole, and a jig saw and sander to shape the perimeter. (Of course there is no reason why the outside shape of the spacer couldn’t be square, if that is easier to make.)
- Sand smooth and paint black.

- Fit the monitor’s plastic locking collar to the rear of the monitor assembly. This locking collar, extending beyond the back of the monitor, can provide some protection space for the cables protruding from the rear of the monitor, so they aren’t being being jammed at an awkward sharp angle between the battery and the monitor. Though to make this work we need to provide a small relief opening in the collar wall for the cables to pass through the collar from the rear of the monitor…..
- Now, we could fit the monitor display directly in this hole, but the rear space is very cramped (against the battery), and the jamming of the monitor cables between the battery and the monitor will most likely compromise the cables over time. So, I suggest making a spacer ring to move the display out from the box just a little….

-
-
- After fitting the collar and marking where the opening should be located, remove the collar and file a small opening in the side of the collar…

- After fitting the collar and marking where the opening should be located, remove the collar and file a small opening in the side of the collar…
- To provide some additional protection, slip the foam ring from the original Kings packaging over the monitor housing before fitting the battery…

- Check the horizontal alignment of the monitor on the front of the box, before fully tightening the locking collar…

-
Step 3 – The Hook Up
-
- With the battery fitted in the box, we can now connect the main battery cables to the battery terminals. As noted above, we also fitted the foam monitor packaging and a thin piece of packaging foam over the top of that, along with some thicker foam at the end of the box, since we didn’t have any divider panels to locate the battery lengthwise in the box..

-
- The (slightly) longer battery cables we fitted make it much easier to assemble the lid on the box with the cables connected. Just check that the cables curl up neatly on top of the battery when fitting the lid. (The cables we used are also a slightly heavier gauge than the originals.)
- Tidy up and cable-tie (or twist-tie) the data cable and the temperature cable connected to the monitor – tuck the tied cable bundles into spare battery box space.
- Double check that all connections are firm, and nuts are tightened. Also check that any crimping of cable ring terminals is robust. Spring washers should be fitted where appropriate to prevent nuts rattling loose in transit.
- Refit the lid.
Step 4 – Powering up & Calibrating
-
- Check that the lid is strapped down tight, then fully charge the battery – preferably overnight on an AC charger with a Lithium charging profile. If you need an AC charger, the Dune 12A Charger (Anaconda) is a good budget-friendly option. The Kickass 16A Charger is a little more expensive, but features an output cable fitted with an Anderson plug for easy connection to your Battery Box.
- NOTE: The Battery Box must be powered ON for charging.
- Once fully charged, disconnect the charger (for an hour or so) and then set the Ah and % battery capacity on the monitor, as detailed in the Kings video above. This calibration procedure is critical for the monitor to provide an accurate SoC reading.

- It is now easy to see the SoC of your Lithium battery in the battery box (remaining Ah and %) as well as how much current is flowing into and out of your battery (A) when the battery is charging or discharging. The Kings videos above, and the monitor manual explain how to use the arrow buttons on the battery monitor to cycle through the display options.
- If not using the battery for a period of time (months), store the battery at around 60%-70% SoC – this will be good for long term battery health.
But wait – there’s more……
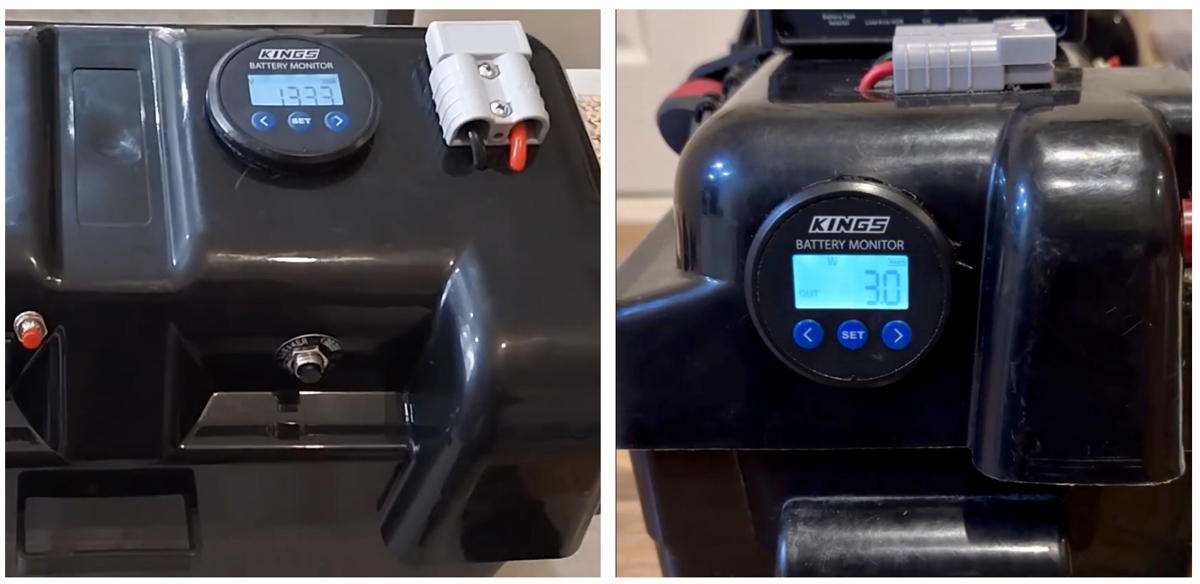
Alternate monitor display locations?
Here are a couple of ideas, if locating the monitor display on the front of the box isn’t suitable for your situation…
Can a Battery Box run an inverter?
 An inverter can be used to run 230V AC appliances from a 12V DC battery.
But there are some pretty important things to understand before you get too carried away….
A 120Ah Lithium battery can supply a continuous current of up to 120 Amps. Realistically probably 100A. An AGM battery, much less.
More importantly, the output sockets on a basic wired Battery Box are protected by 30 Amp fuses. These fuses protect the internal cabling and other components inside the Battery Box. This setup is ideal for running portable 12V fridges and other low power 12V accessories, as well as recharging mobile phones, etc.
So how about an inverter?
The biggest issue to be aware of when considering an inverter is the amount of 12V electrical current required to run 230V AC appliances. An inverter doesn’t draw too much power itself – but the appliances connected to an inverter can draw huge amounts of electrical current from a 12V battery. Much more than a basic wired Battery Box can handle.
Considering the formula P=VI (Power = Volts x Amps) the absolute maximum power your basic 12V Battery Box can supply before blowing one of the 30A fuses is 360 Watts (12 Volts x 30 Amps = 360 Watts). That’s in theory.
Let’s play it safe, and consider that, in reality, the maximum power that can be supplied by a basic Battery Box to an appliance connected to an Inverter, before blowing a fuse, is about 300 Watts (W). This is probably OK for recharging laptops, drone batteries, e-Bike batteries, etc. But you won’t be running microwave ovens, hair dryers, etc. Check out the iTechWorld 400W inverter, or the Kings 1000W inverter for a couple of low cost low power inverter options.
If you aren’t sure, check the power label on the appliance. If it suggests anything over 300W, look for another option.
Also keep in mind that drawing 30 amps of current to run an appliance through an inverter is going to discharge your battery pretty quickly. Considering that your fridge draws a maximum of 3 amps, you can understand that you will need some serious recharging facilities if you are regularly running 230V AC appliances through an inverter, discharging your battery 10 times faster than your 12V fridge.
(Note: Although the ring / screw terminals on the Kings battery box aren’t fused internally, and could be used to bypass the internal fuses on other outlets, any heavy current drawn through these outlets still runs through the On/Off power switch and internal cabling, which is rated at 40A according to the Kings product manual.)
Battery Box alternative with a Monitor + 120 Amps output:
Kings BatBlock25 | iTechWorld Battery Boxes